
DIY Potting Bench
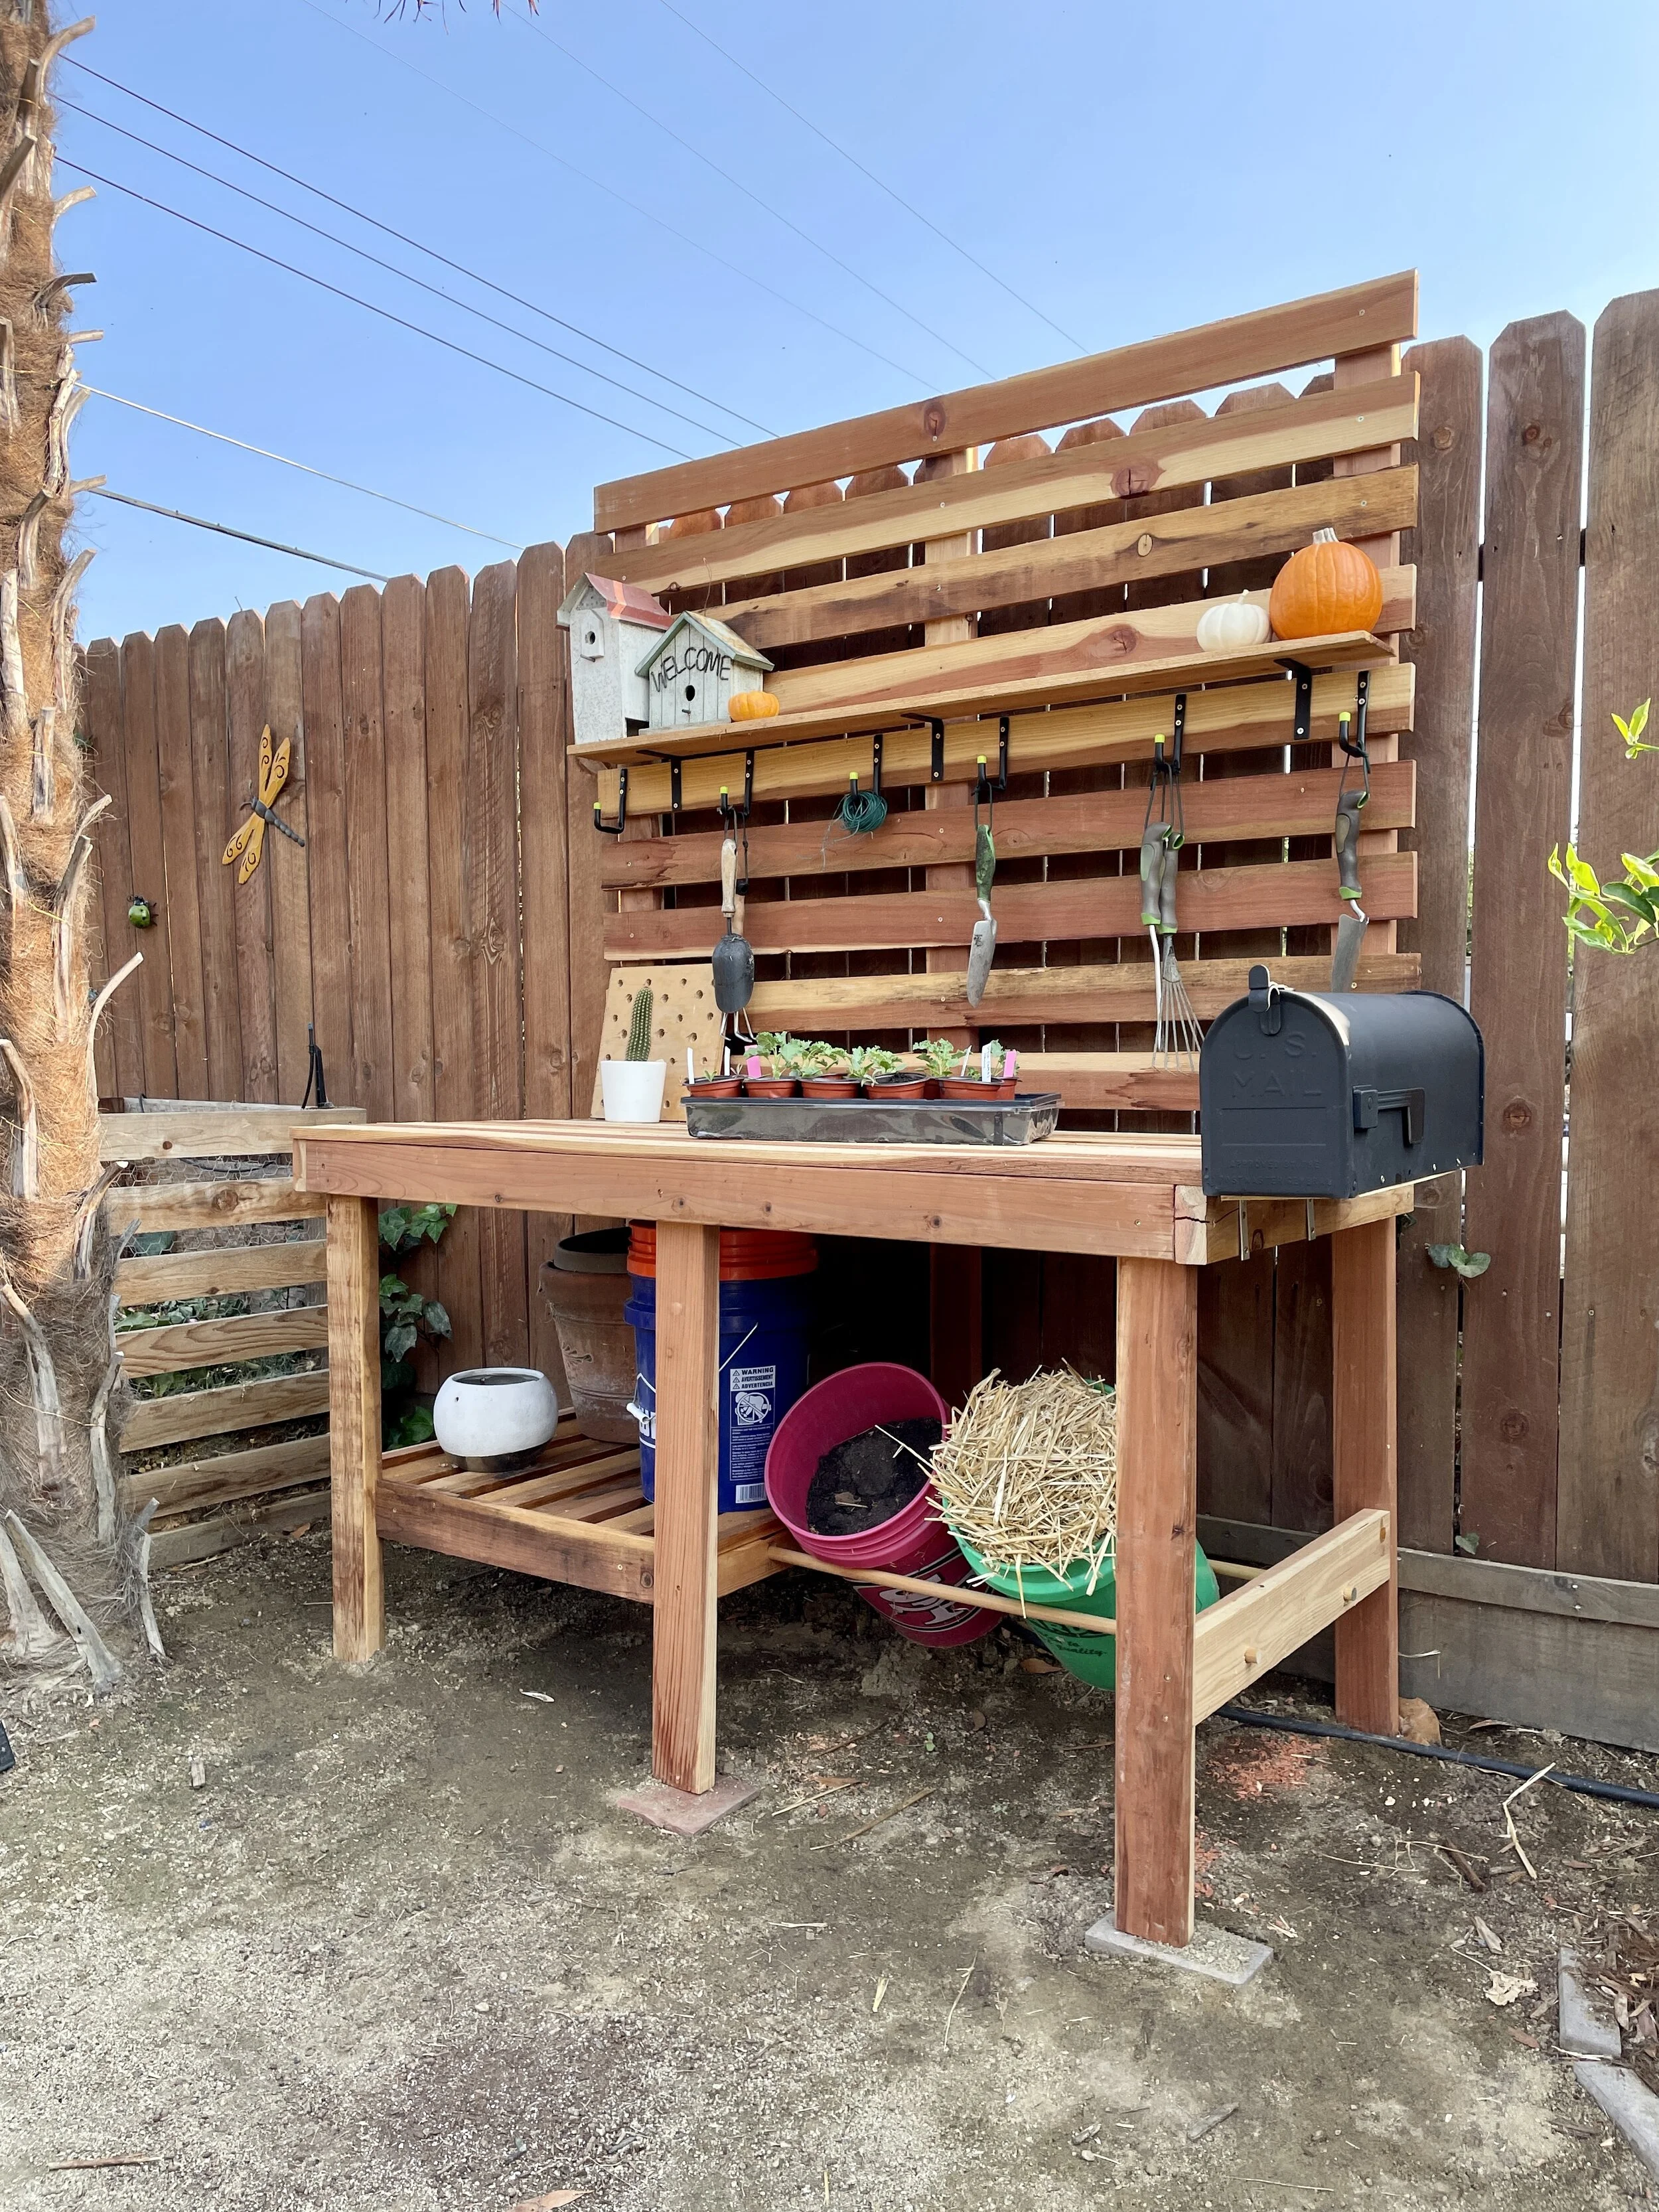
Every gardener needs a potting bench. For us, we have been planning to build one for a couple years and finally got around to doing it and I am thrilled with how it turned out. It took a day to build with two sets of hands and lucky for you, we are sharing our plans and cut list with you to hopefully save you even more time. You can of course adjust the size of your potting bench to fit the space you have, but keep in mind, the plans outlined below will build a potting bench that is a total of 85” tall, 60” wide and 30” deep.
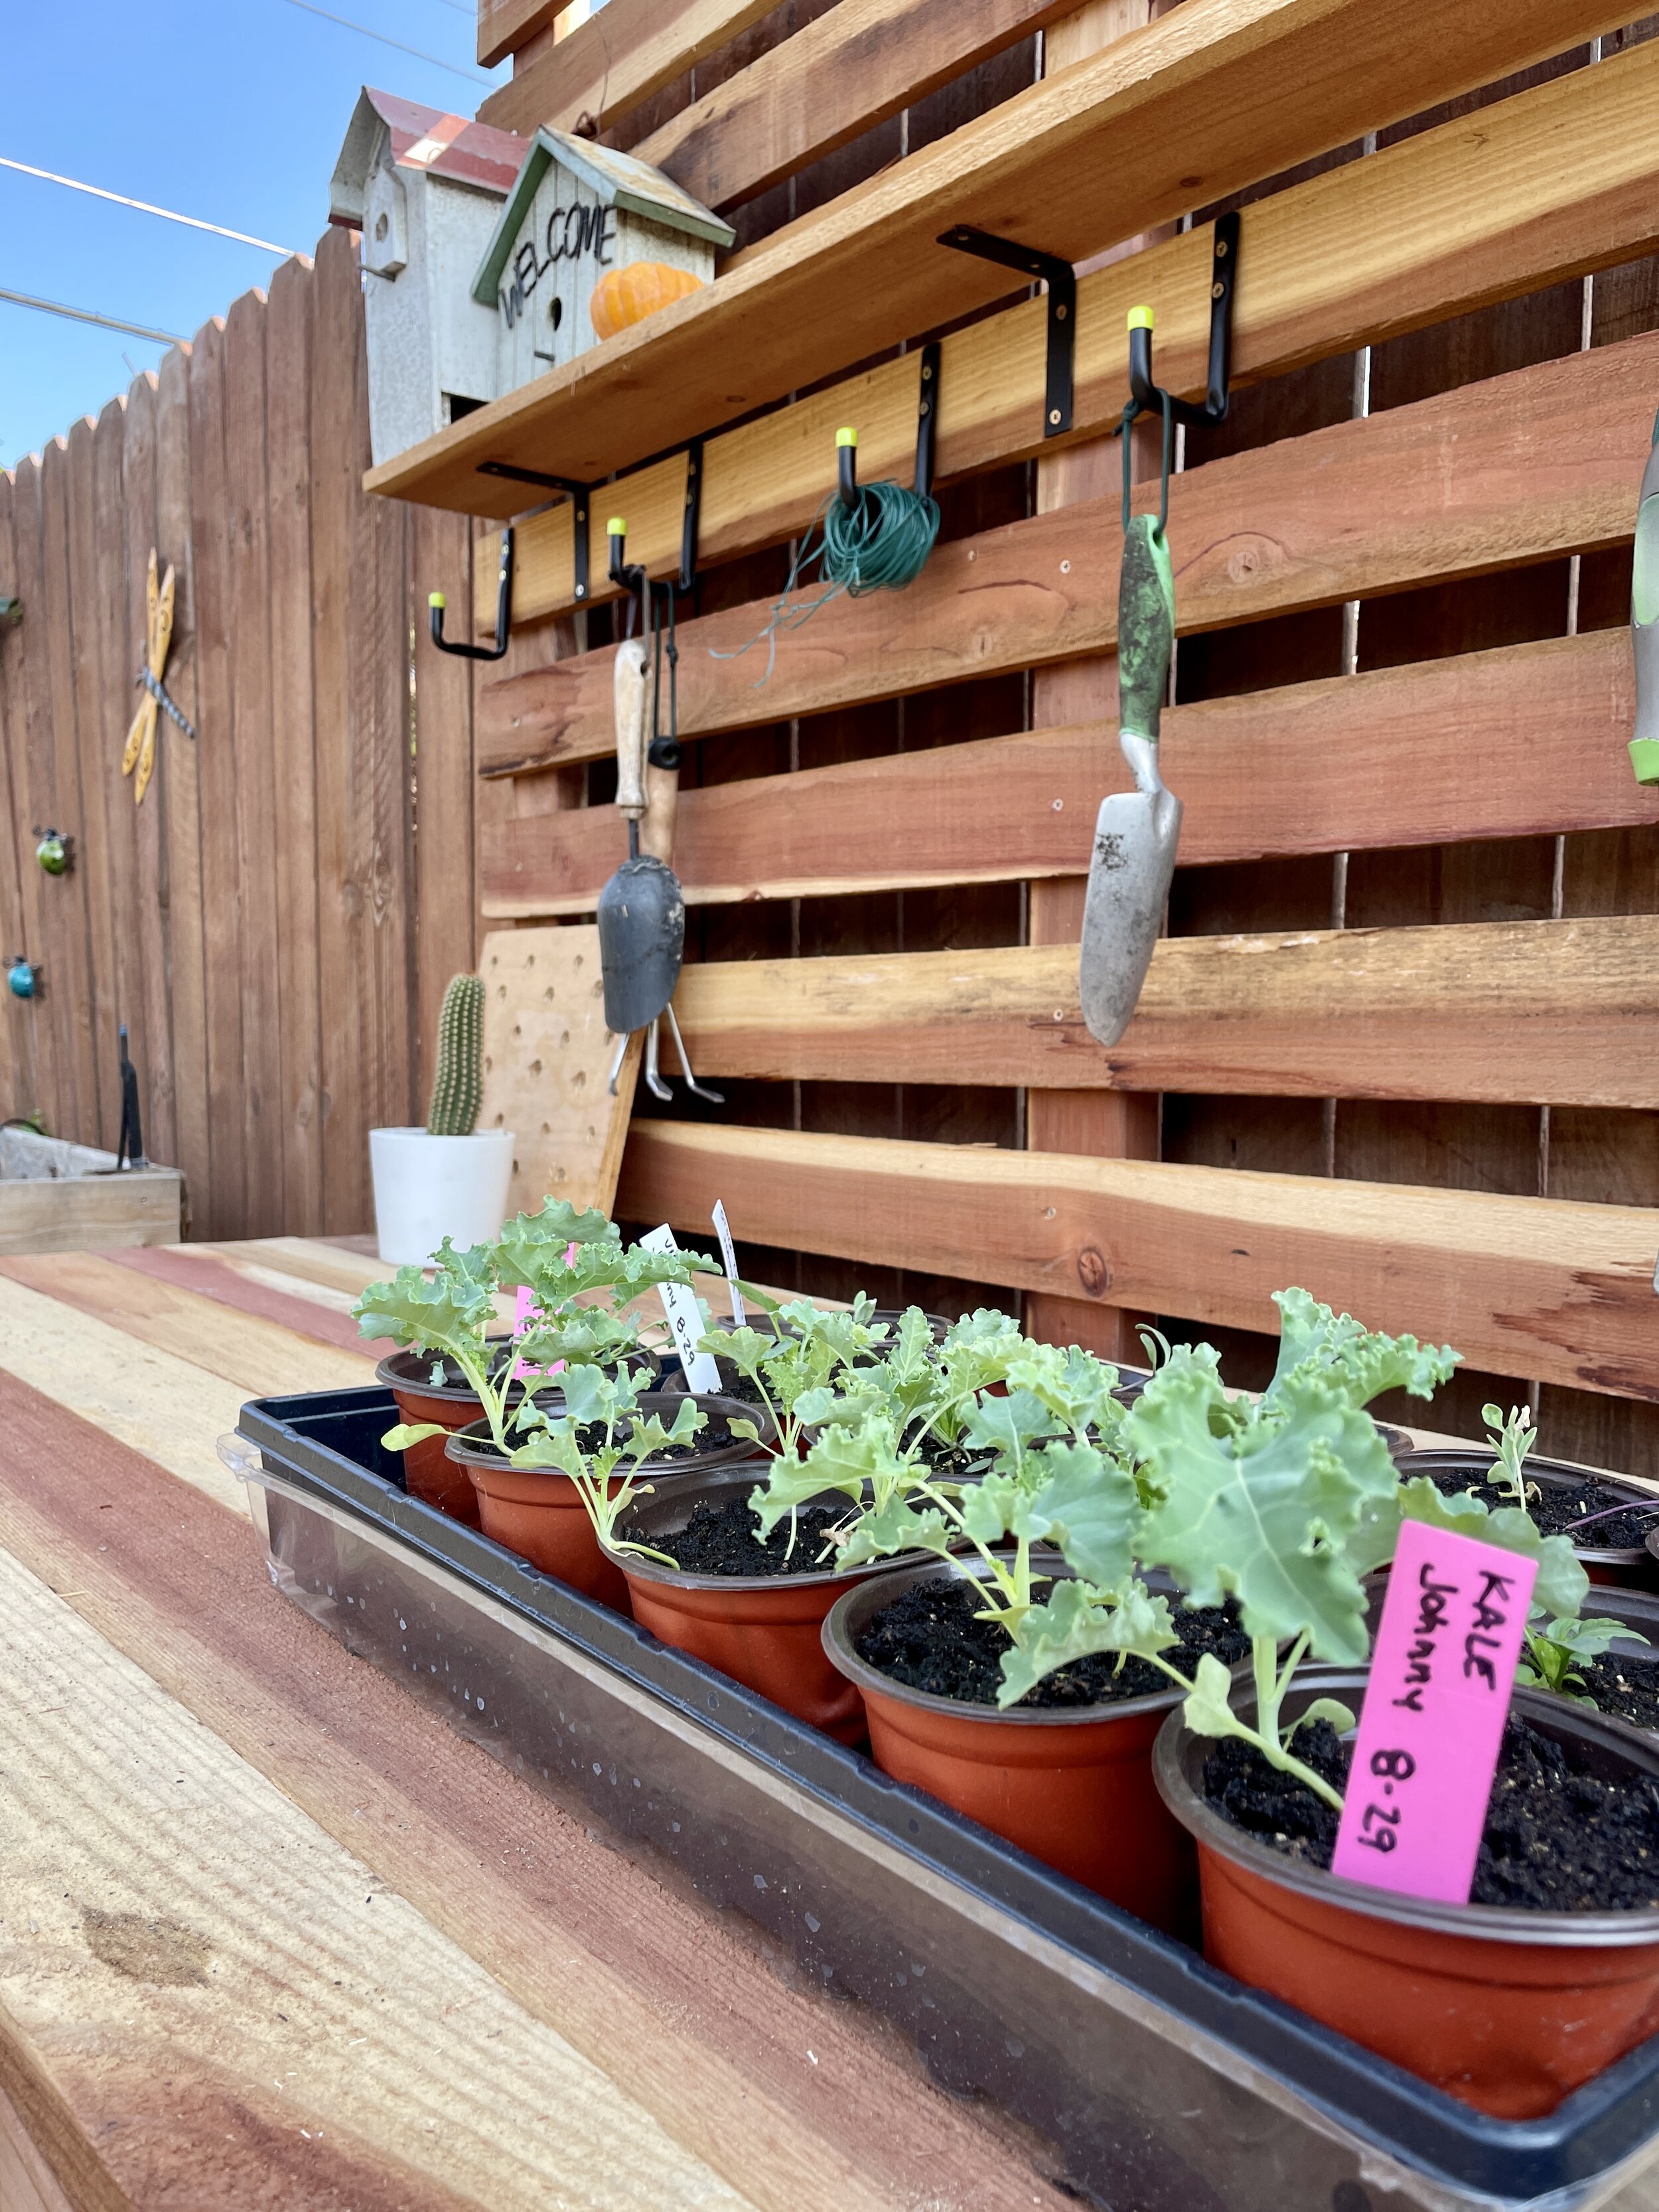
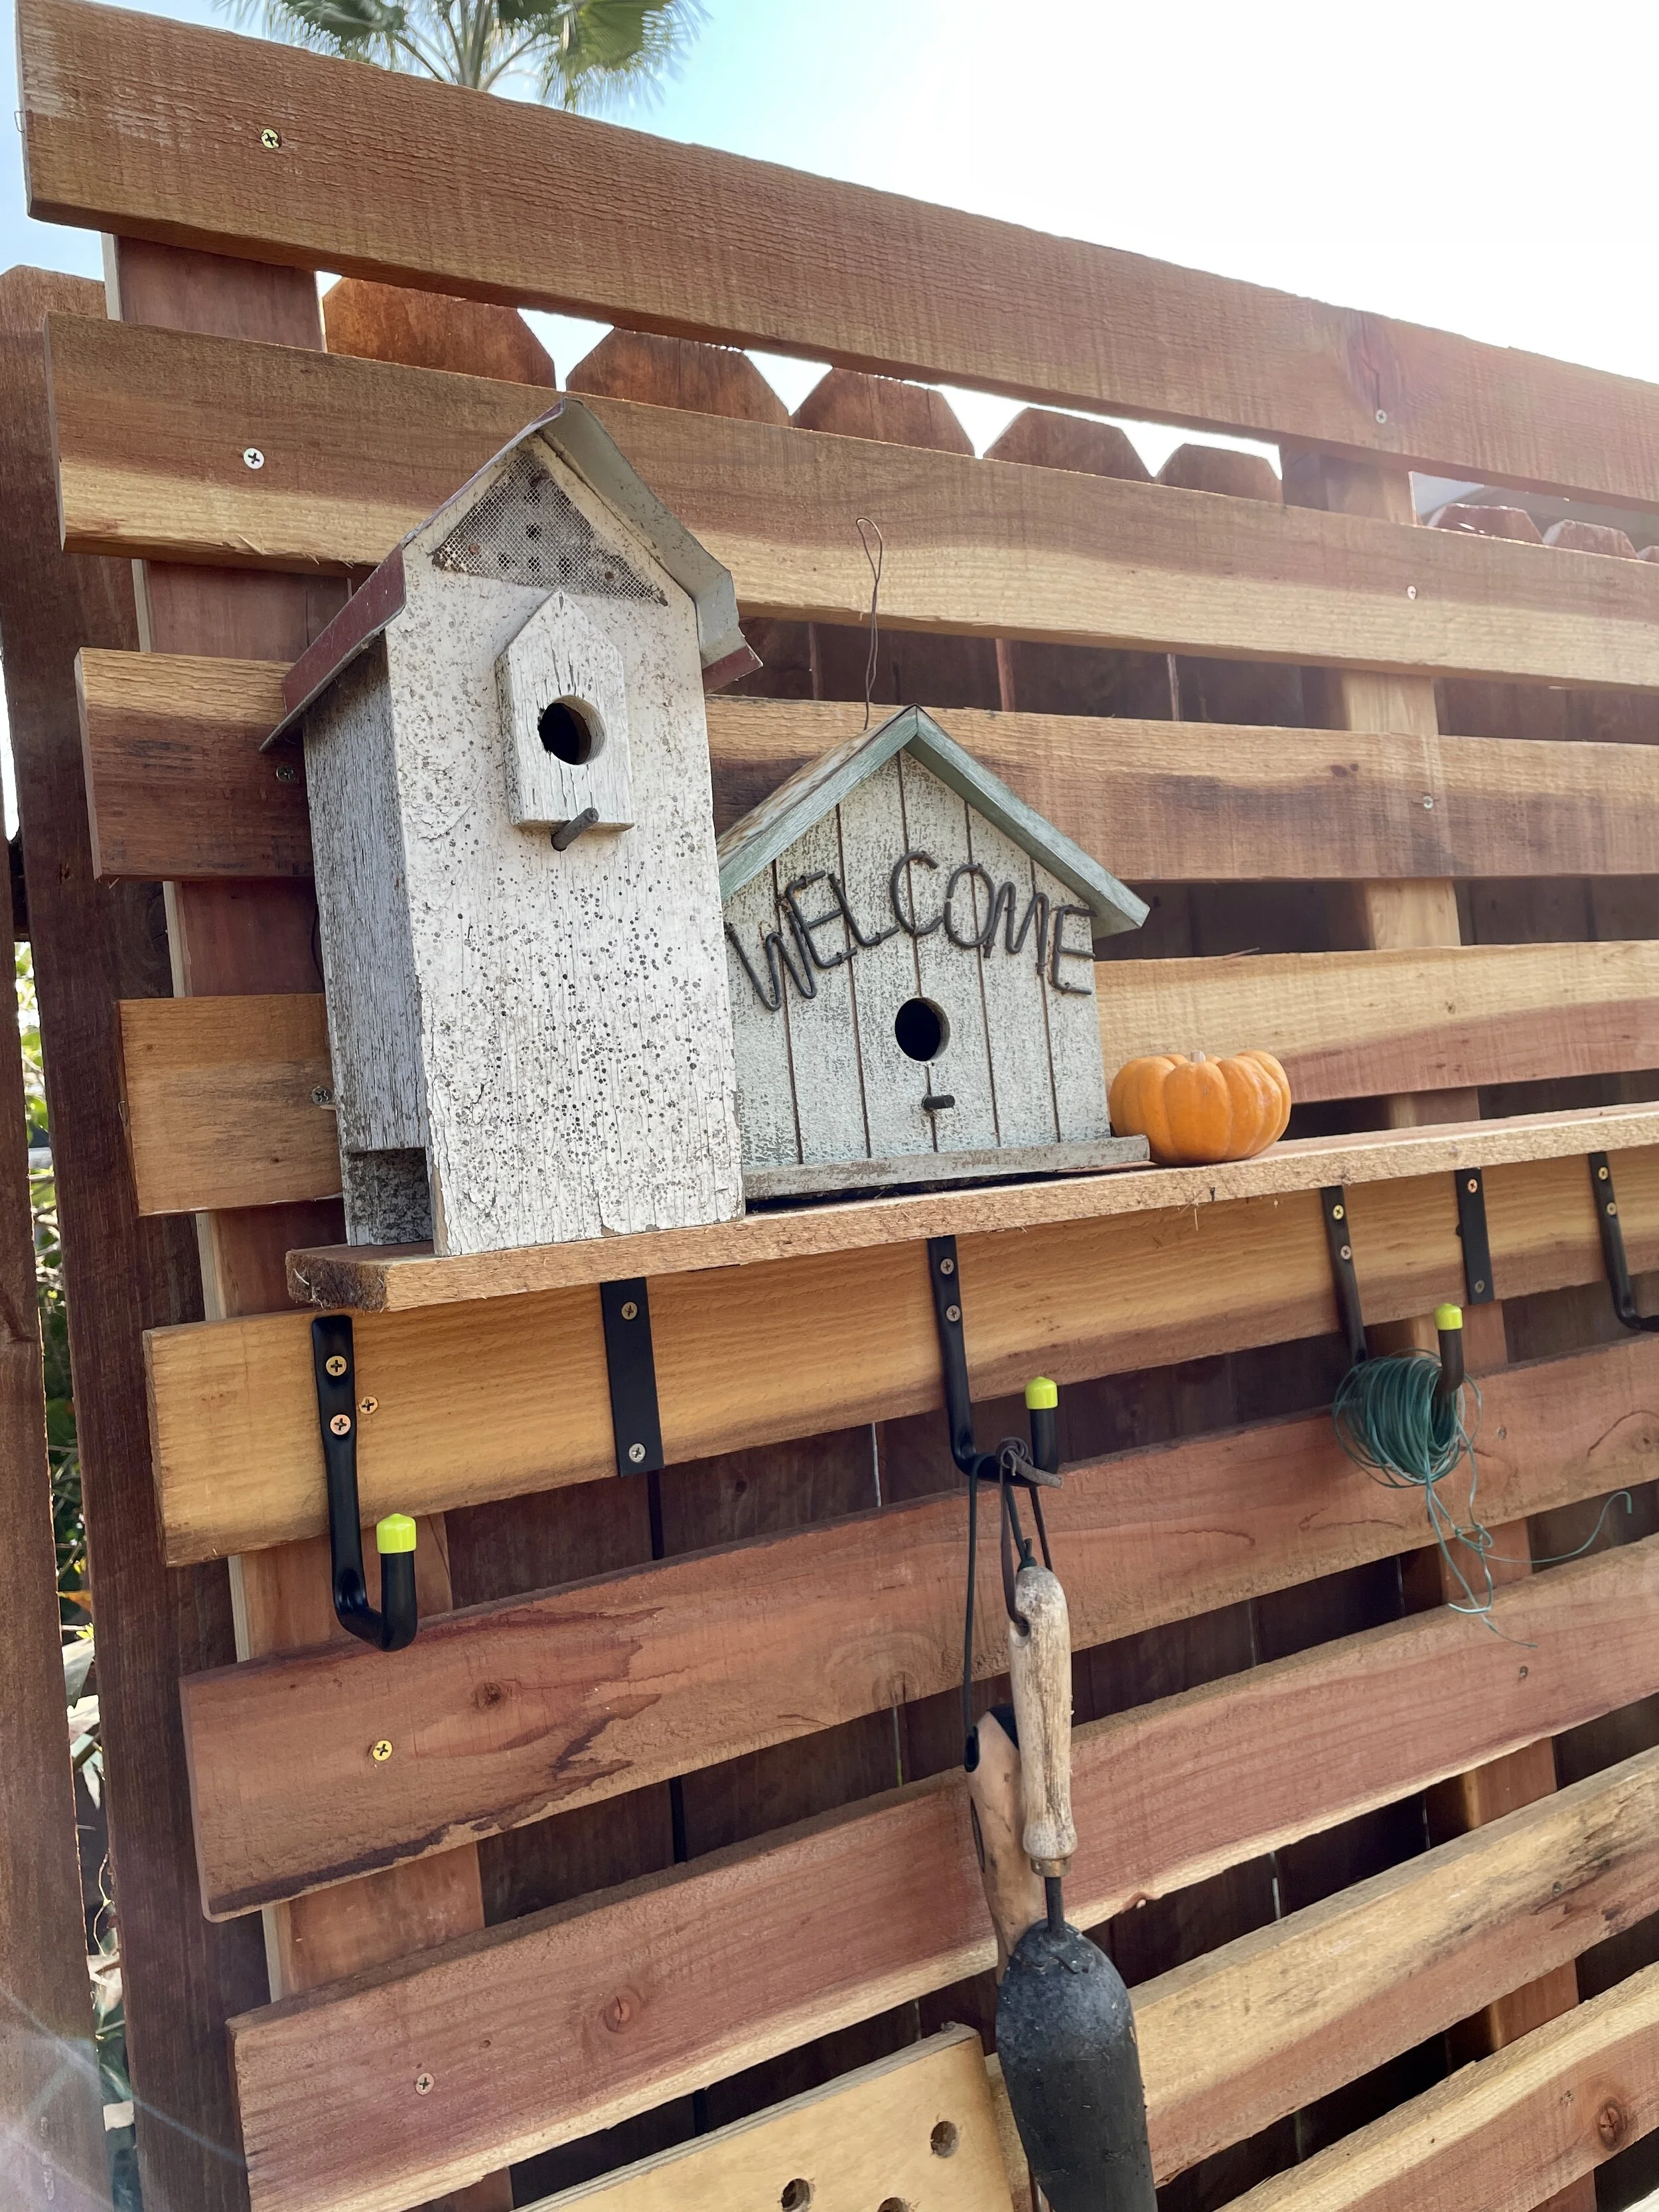
Our potting bench features a nice big potting area, a back ‘trellis’ like design to hang your tools, plus storage underneath for a couple 5-gallon buckets and a shelf for more storage - because you need to put your extra soil and pots somewhere. The slat-wall like trellis design isn’t new to us. We actually built a pergola last year using the same design, which is why we wanted to mimic it with our potting bench.
In terms of materials, the best wood to use is a rot-resistant wood like Redwood or Cedar. If you use a different type of lumber you will want to seal the wood to prevent rotting. We don’t recommend using pressure treated wood in the garden because the chemicals used to treat that wood are known to leach out and could infect soil and therefore should not be used when you are gardening food.
For our potting bench construction, we used simple butt joints for all the cuts, but there are spots where a miter joint would work well too. Just keep in mind, if you use a different cut, the cut list we provide may need to be adjusted.
DIY Garden Potting Bench
Tools Needed:
Chop/ Miter Saw
Drill
7/8” Auger Bit
Tape Measure
Pencil
Level
Shopping List:
2” Exterior Screws
1” Exterior Screws
x6 2x4x10 Redwood Lumber
x2 36” Dowel Rods, 3/4”
x10 1x4x12 Redwood Lumber
OPTIONAL: *Upper Shelf* x1 1”x6”x5’ Redwood
x3 4” L-Brackets
x12 1/2” Exterior Screws
Cut List:
2x4x10s
3 boards cut for x1 85” and x1 35” board each
1 board cut for x2 60” boards
1 board cut for x2 30” and x2 27” boards
1 board cut for x3 at 27” and x1 24”
Dowel Rods
Cut each rod to 36”
1x4x12s
8 1/2 boards to make 17 cuts at 63”
1 boards to make 5 cuts at 27”
1/2 board to make 1 cut at 27” and 1 cut at 24”

Step-By-Step Instructions on How to Build a Potting Bench
OUR YOUTUBE VIDEO WILL GREATLY ENHANCE THESE INSTRUCTIONS
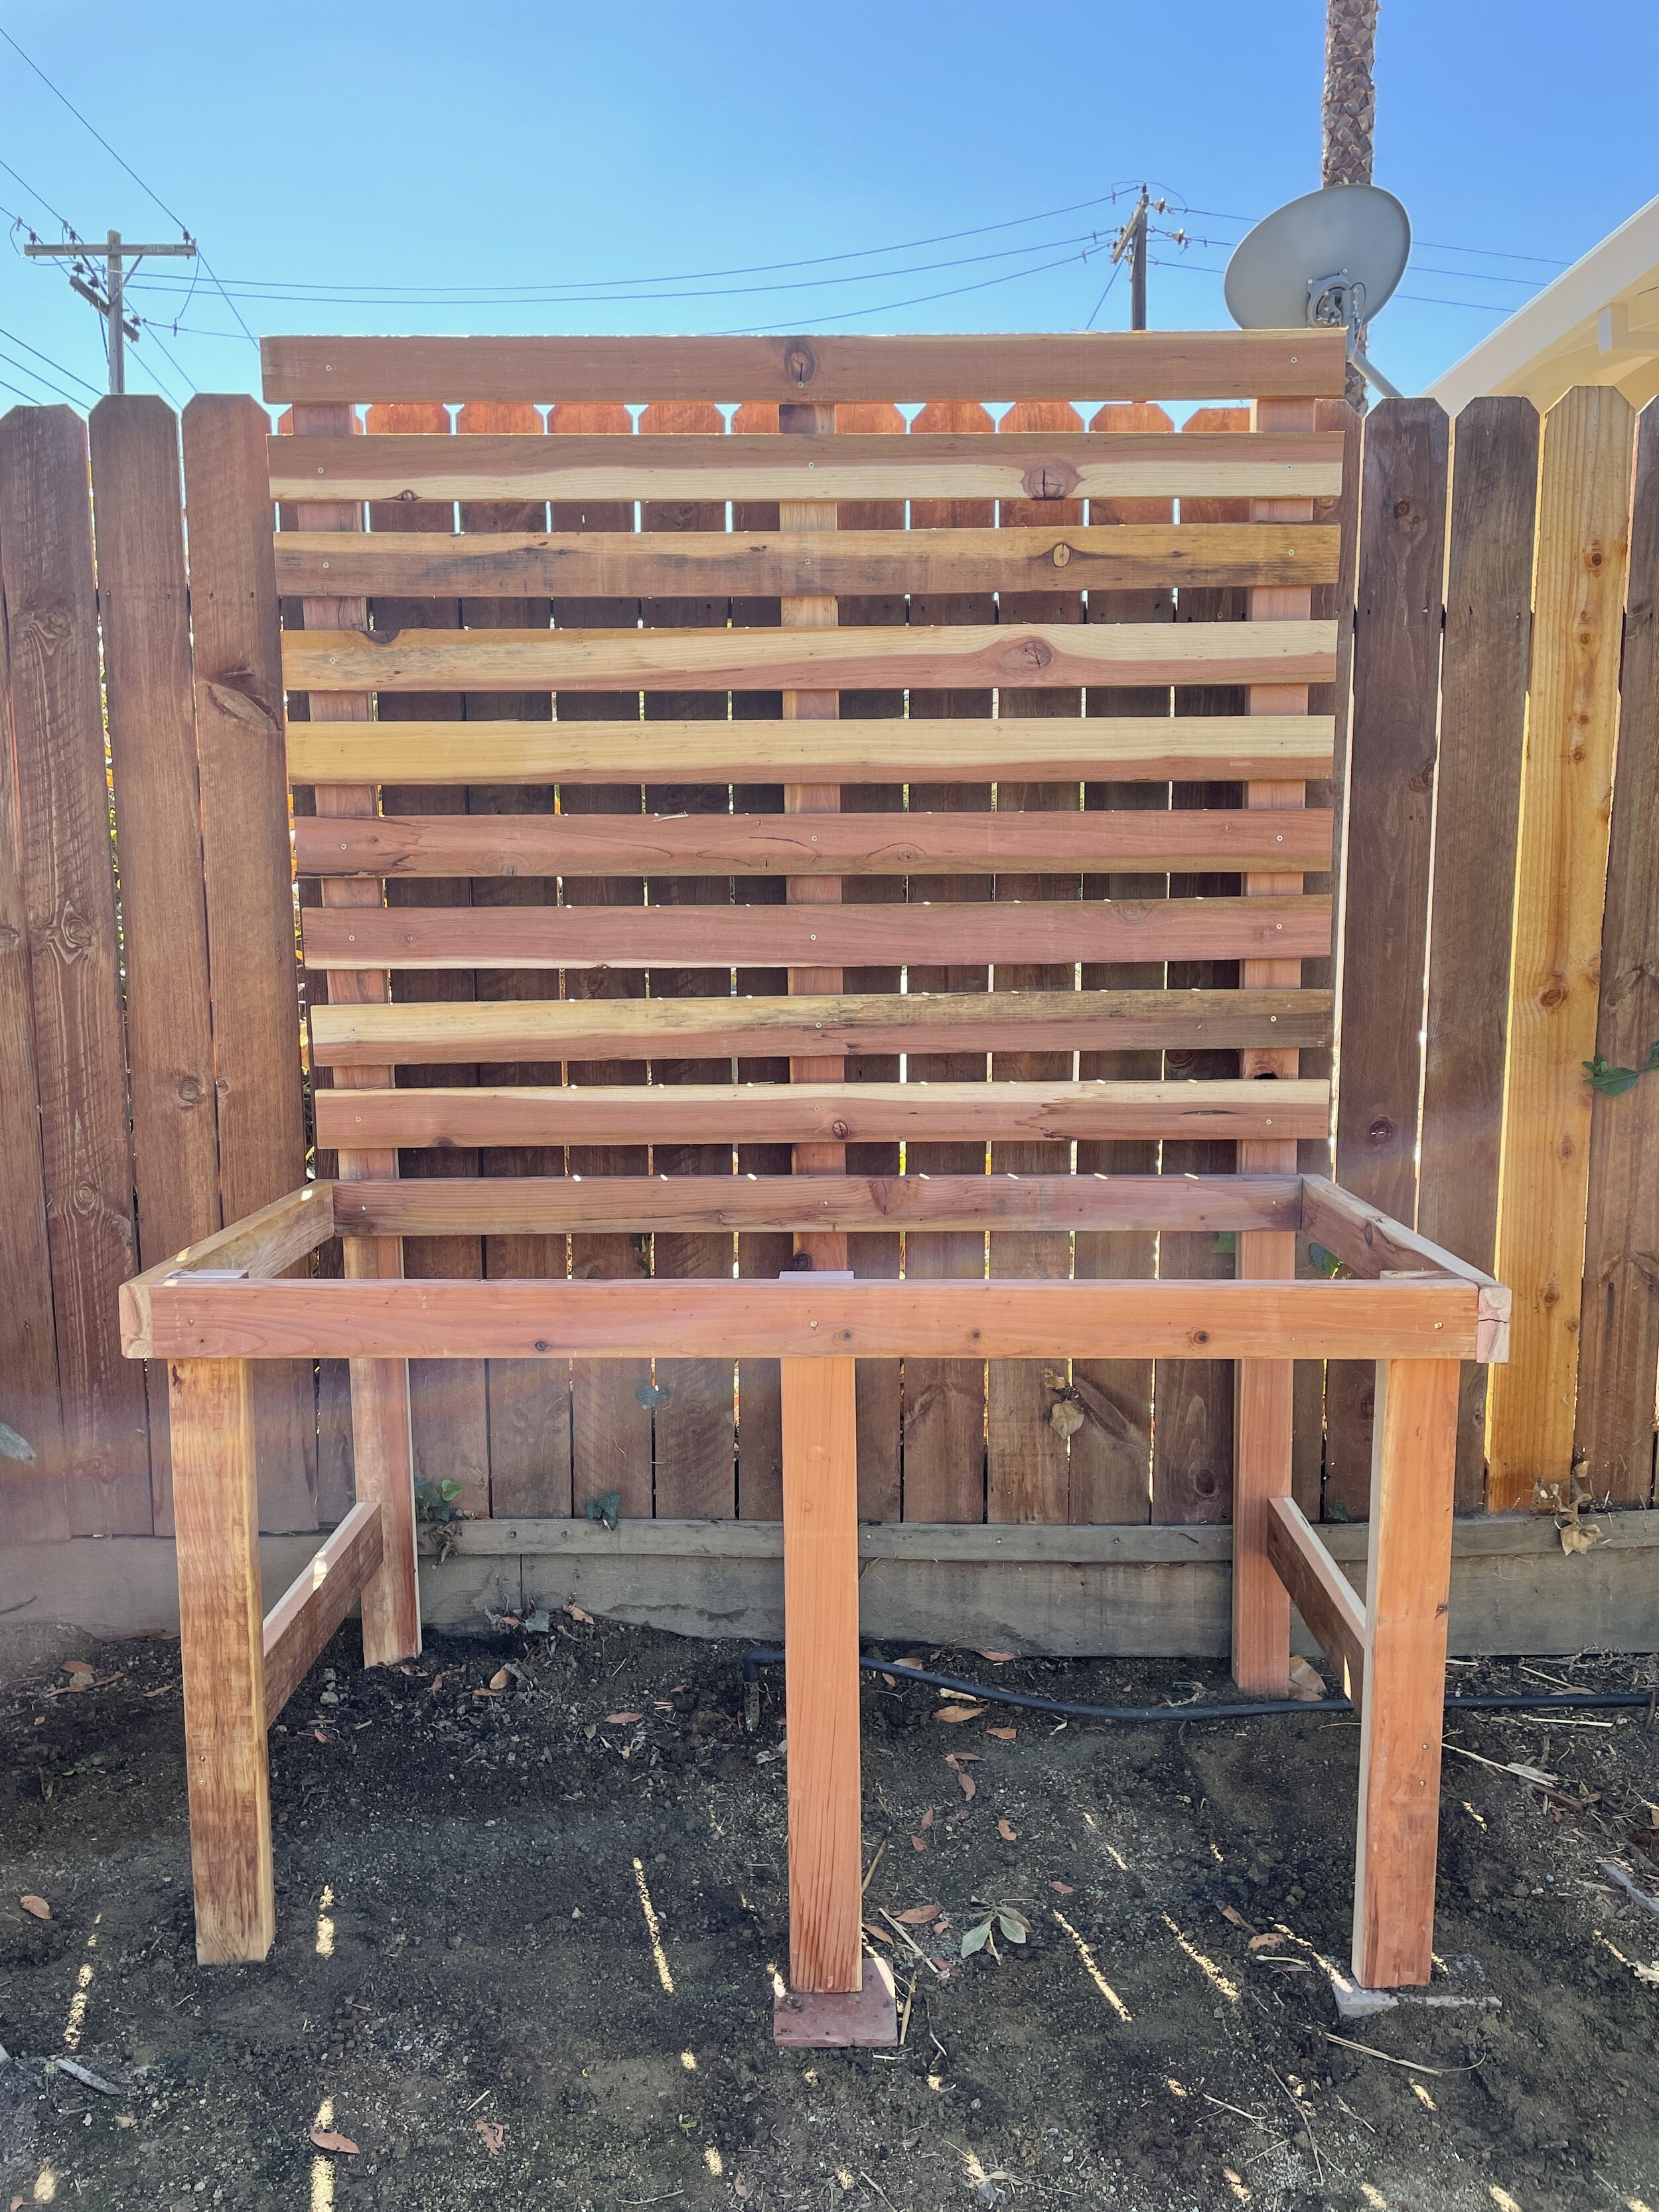
one: The Frame
Begin by creating the back wall of the potting bench by laying x3 of the 85” cut boards down flat. Then lay one 60” board down perpendicular at 35” up from the bottom and attach the outer two 85” boards to it. Center the middle 85” board and attach at 30” center on the 60” horizontal board.

Dry-fit the back frame prior to drilling any boards together
Next you want to build the front frame for the bench. Begin by laying the x3 35” boards flat and attach the second 60” support to the front of these boards flush to the top. Again, make sure you measure to the middle fo 30” and ensure the center board is attached there.
The front of the potting bench frame. Be sure to attach the 60” front board and the 30” side board to the outsides of the 35” legs.
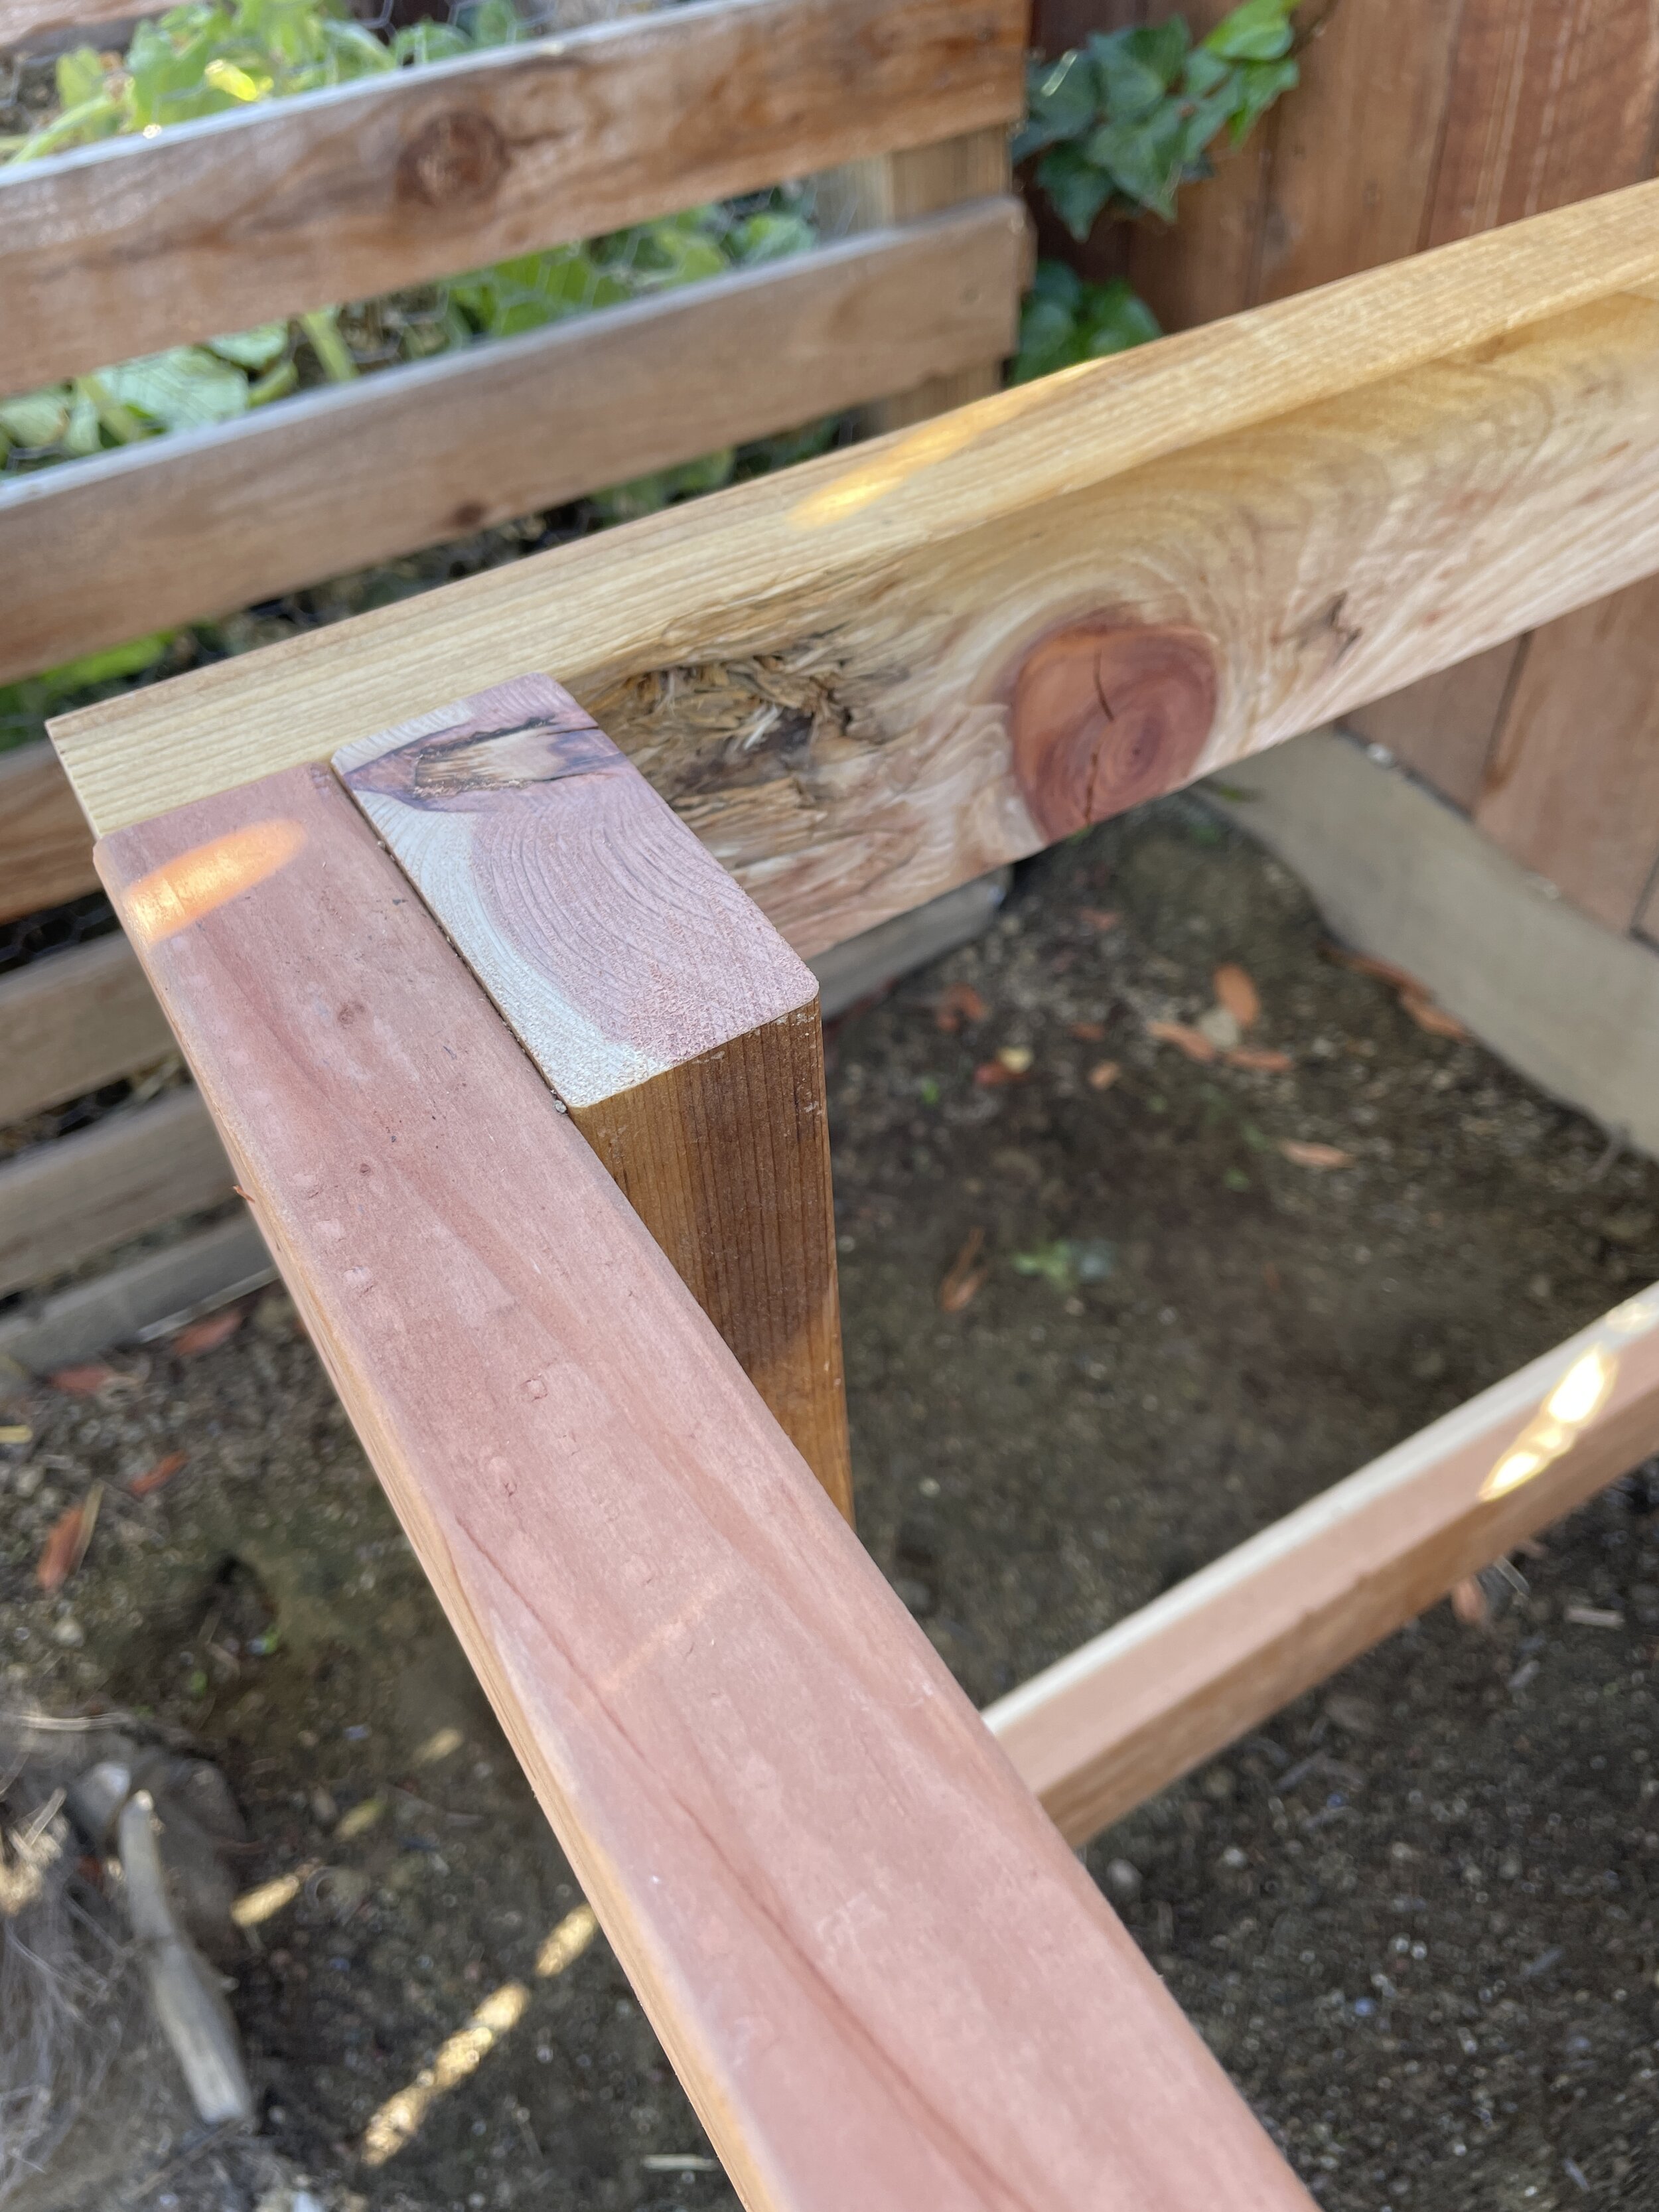
For the horizontal cross brace that attaches the back to the front, you will take one 30” board and screw it in to the top of the 35” frame front facing to create an “L”. Repeat this step for the other side to create an “U” structure that is ready to be attached to the back wall.
To attach the front an back together, we found it easiest to lean the back 85” frame against the side of our house. Ideally with an extra set of hands, then lift up the front frame and attach the 30” cross-piece to the 60” horizontal board on both sides. Note: Be sure to screw the side braces into the horizontal back brace, and not the vertical 2x4”.
Lastly, attach a 27” board on each of the left and right bench supports. The bottom of the 2”x4” will be 10” from the bottom. This will create a the structure for the future bucket rack as well as the lower shelf.

two: The Back Slats
Using 1x4” Unfinished Redwood, cut 9 boards to 63”.
Using scrap create a 1 3/4” spacer block
Start at the top (so the top is flush) and work your way down using your spacer block to ensure even spacing. There may be a slightly larger gap at the bottom, but this will be less noticeable because of the countertop.
To start the first board, measure to the middle (31 1/2”) and screw it centered into the middle vertical board on the back frame. Make sure you are level, then attach the left and right. Continue down.
If you notice that the top is beginning to lean forward, ensure that the rear 27” support has 2 screws, this will help stabilize the frame.
three: Move into Position and Level
This step will vary greatly for each of you, depending on specifics of your location. Long story short, you want to make sure that you level the location so your potting bench is level and easy to work on. For us, we used a shovel and dug down around a few of the legs posts to get our bench level overall. We even used a couple bricks for the front legs to help us achieve levelness.

four: The Bucket Dowels
The dowel rods are hard to explain, but we will do our best. If needed, check out the images or our YouTube if you need a visual. A few things to note before you start drilling:
The dowels will be inserted through the 2x4” support from the right
When you drill through the center 2x4” with the auger bit, be sure to not go all the way though, This will ensure that your dowel can’t slide left to right and will stay snug.
Also note, that the front dowel will sit higher than the dowel to the rear. This will ensure a good angle to get to things within the buckets.
Feel free to play around with a bucket to determine what angle you like best. This could affect the measurements as the angle you like might be different from ours.
Begin by attaching a 27” center post to your potting bench frame. This will act as overall support, but also where the dowels will ‘die’ into. Using a 7/8th Inch auger bit, drill the first hole at around 6” from the front of the bench, and above the center line vertically (the bottom of the hole will be around 2 1/2” from the bottom of the 2x4”). Go completely through the 2x4”. Drill a second hole, only halfway through, on the same spot on the inside right of the center support.
Repeat the above, but at 8” from the rear of the bench, and lower on the 2x4”. Insert the dowel rods from the right, lay your buckets in and viola, bucket storage.

five: The Lower Shelf
We used the same 1x4s for the top portion for the shelf. But to begin, you need to first cut two boards at 27” and attach them between the far left and center supports at the front and back of the bench. These boards should be tucked behind the front 2x4” and in-front of the back 2x4”. Do the same with a back brace. Then attach x6 1x4”s cut to 27” running front to back evenly spaced.

six: The Countertop
First take a 2x4” cut to 24” and attach this to the center of the bench running front to back. This will not only be your ‘nailer’ for the countertop and contribute to extra support for the countertop. Now grab x8 1x4” boards cut at 63” to build the countertop. We recommend dry-fitting your countertop boards first to make sure that the best looking side is facing up- plus some boards may be warped so this is the best time to work out any gaps.
Begin by screwing in the board closest to you, so it is perfectly plumb with the front of the bench and work your way back. The boards should fit tight with each other.

seven: The Shelf
To attach the shelf, we are using 4” L-Brackets with a 1x4” board cut to 63”. Since the board is only 3/4” thick, you will want to use 1/2” screws to attach the board to the L-Bracket. Evenly space the x3 brackets across the board and attach. Then flip the board over and attach to the slat wall at height of your choosing.
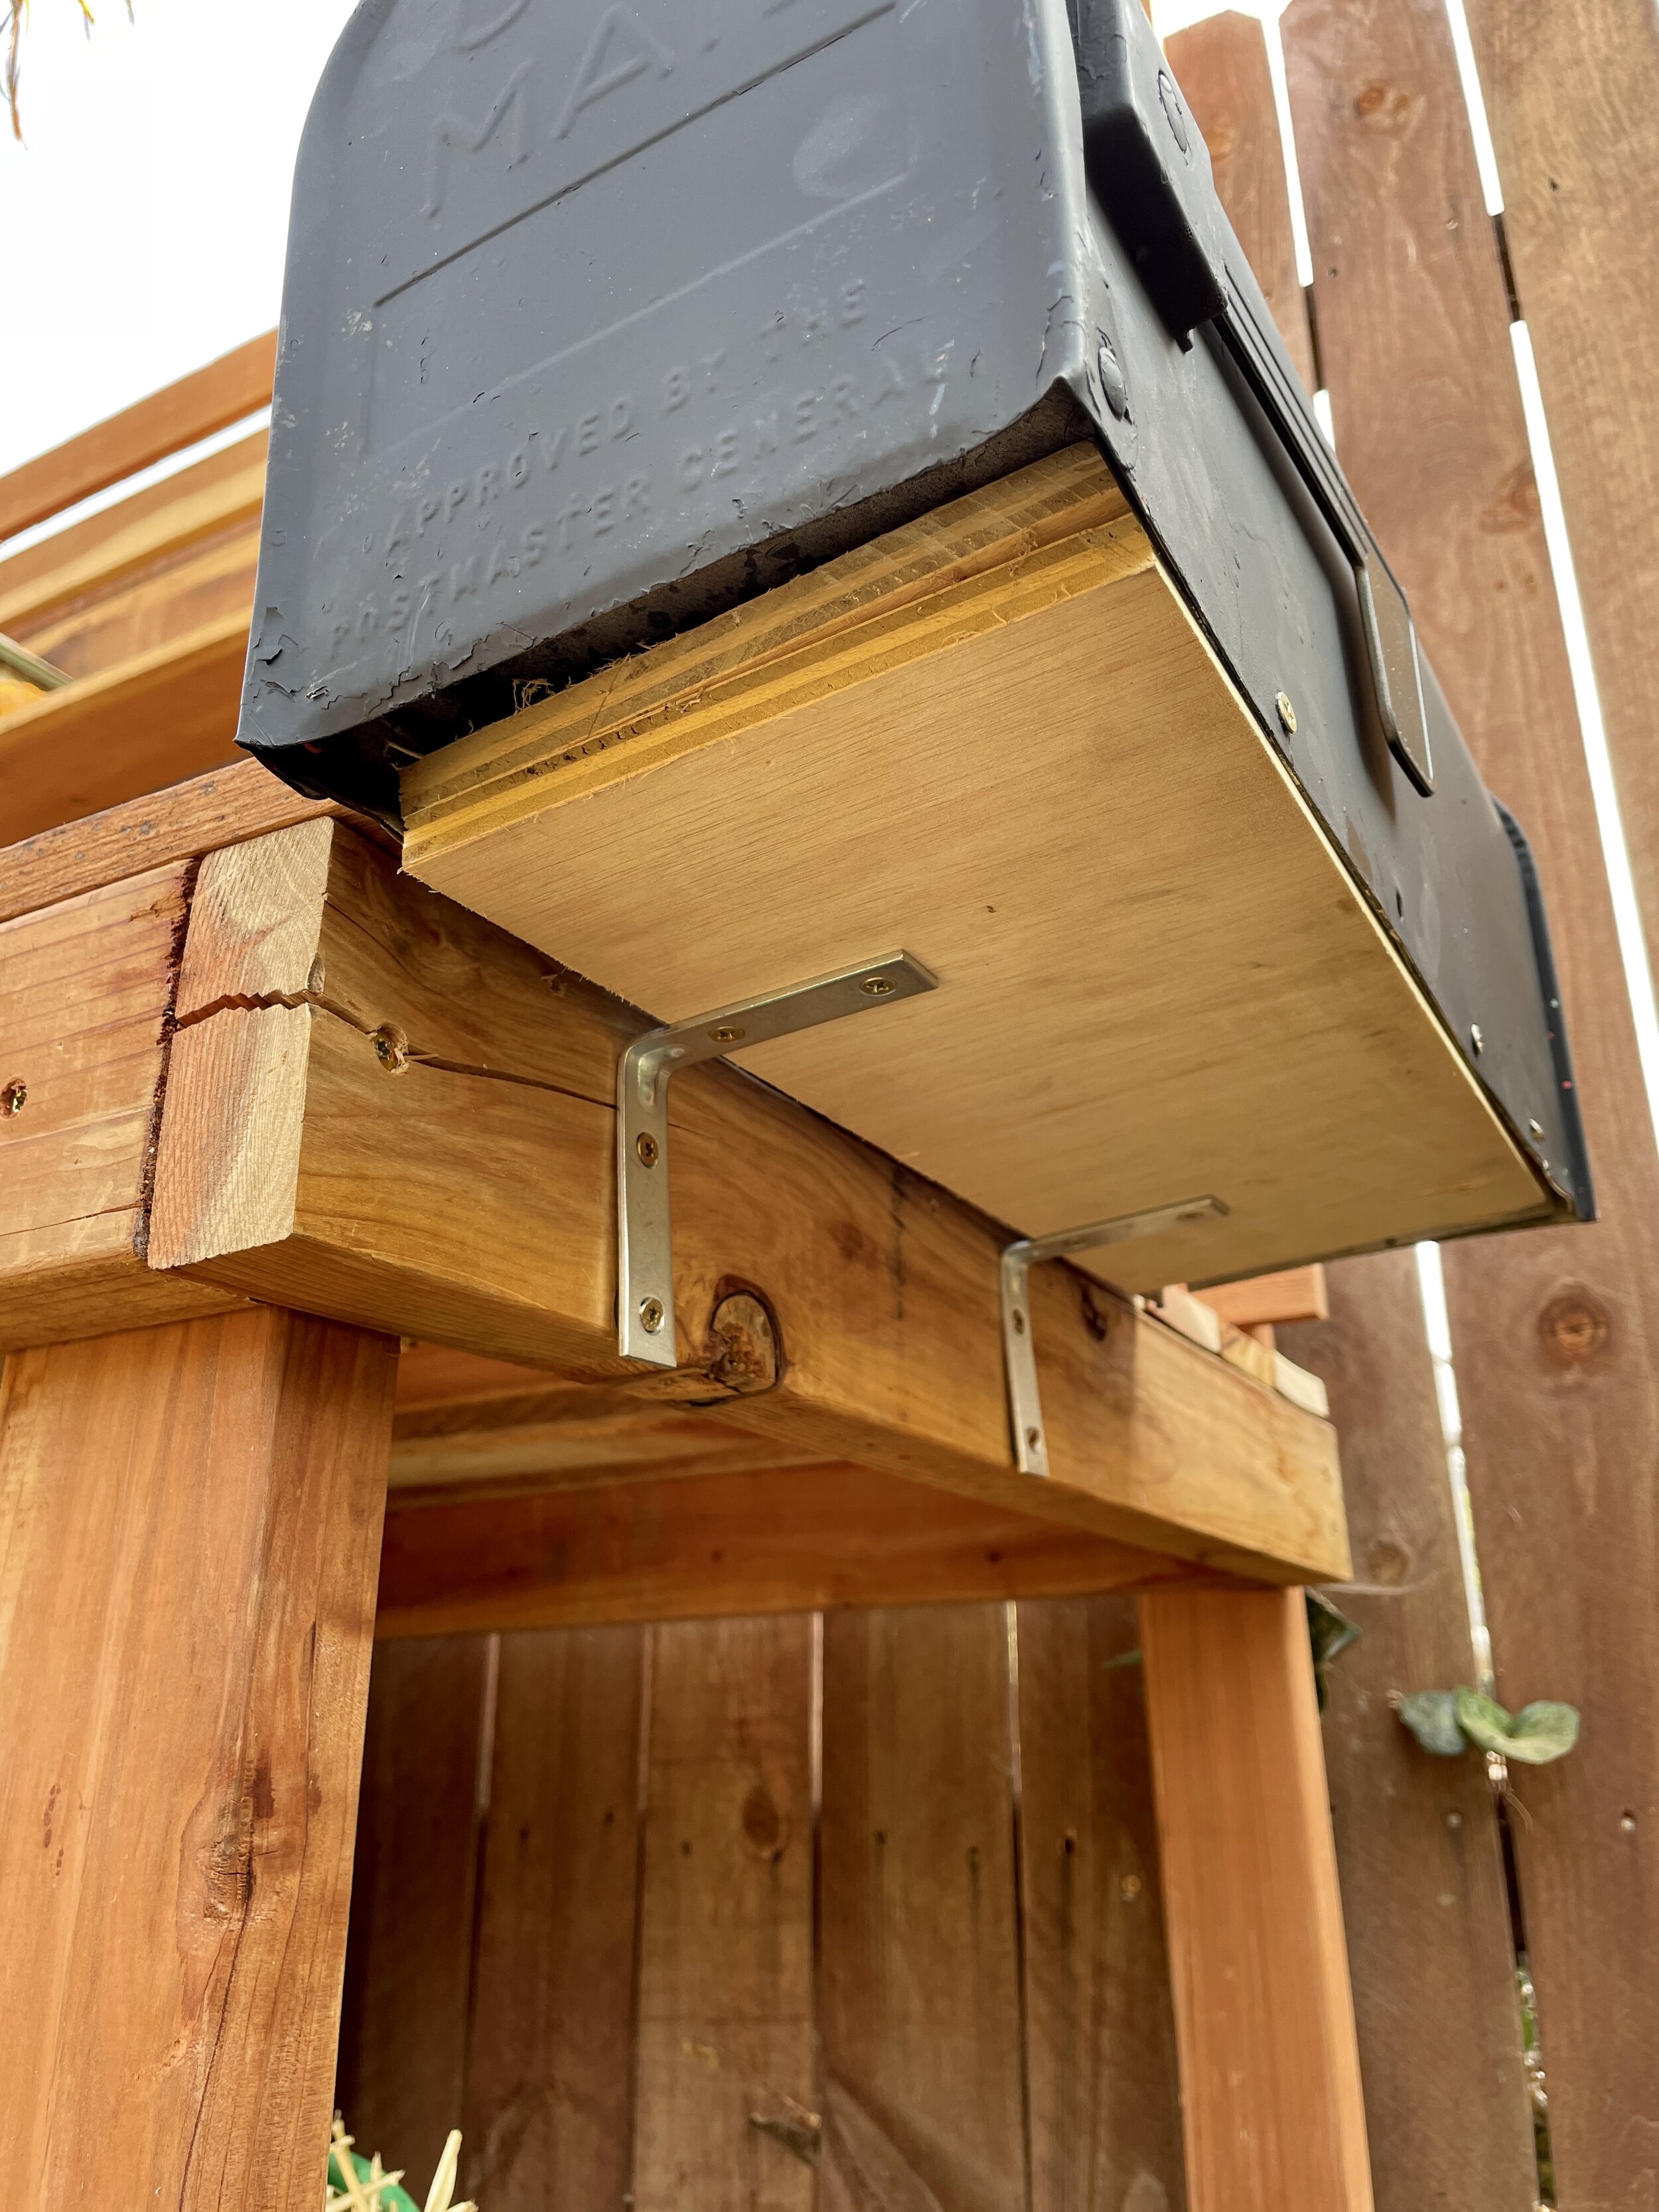
BONUS: MAIL BOX!!
We added a mailbox for extra storage. To attach this, we cut some extra plywood we had lying around and used additional L-brackets. We built a shelf using the plywood and brackets then attached the mailbox to it. It’s the perfect addition to keep gloves and pruners out of the rain!
And that’s a wrap! We hope this tutorial helps you build a functional and beautiful potting bench for your backyard. If you have any questions be sure to comment below or reach out to us on Instagram! Oh and be sure to share your finished product with us @OurLibertyHouse, we would LOVE to see it!
If you are building your garden you may also enjoy our other DIY video’s below, so be sure to check them out!
DIY Raised Garden Beds
DIY Dual Compost Bin
DIY Vertical Trellis
Happy Building!
-Beth & Lucas