
The BEST Two Bin Composter: DIY in 5 Easy Steps
This post does contain affiliate links. By clicking the link and making a purchase we receive a small commission at no additional cost to you! This helps us keep the lights on and continue to bring you great content.
Compost, compost, compost… everyone is talking about compost. Look at YouTube, Instagram, or Facebook and the compost revolution is beginning. And for good reasons too! Composting in your yard is a great way to not only provide great nutrition to your soil but also reuse every day waste around your house. But in order to compost effectively, you need a good space to do it!
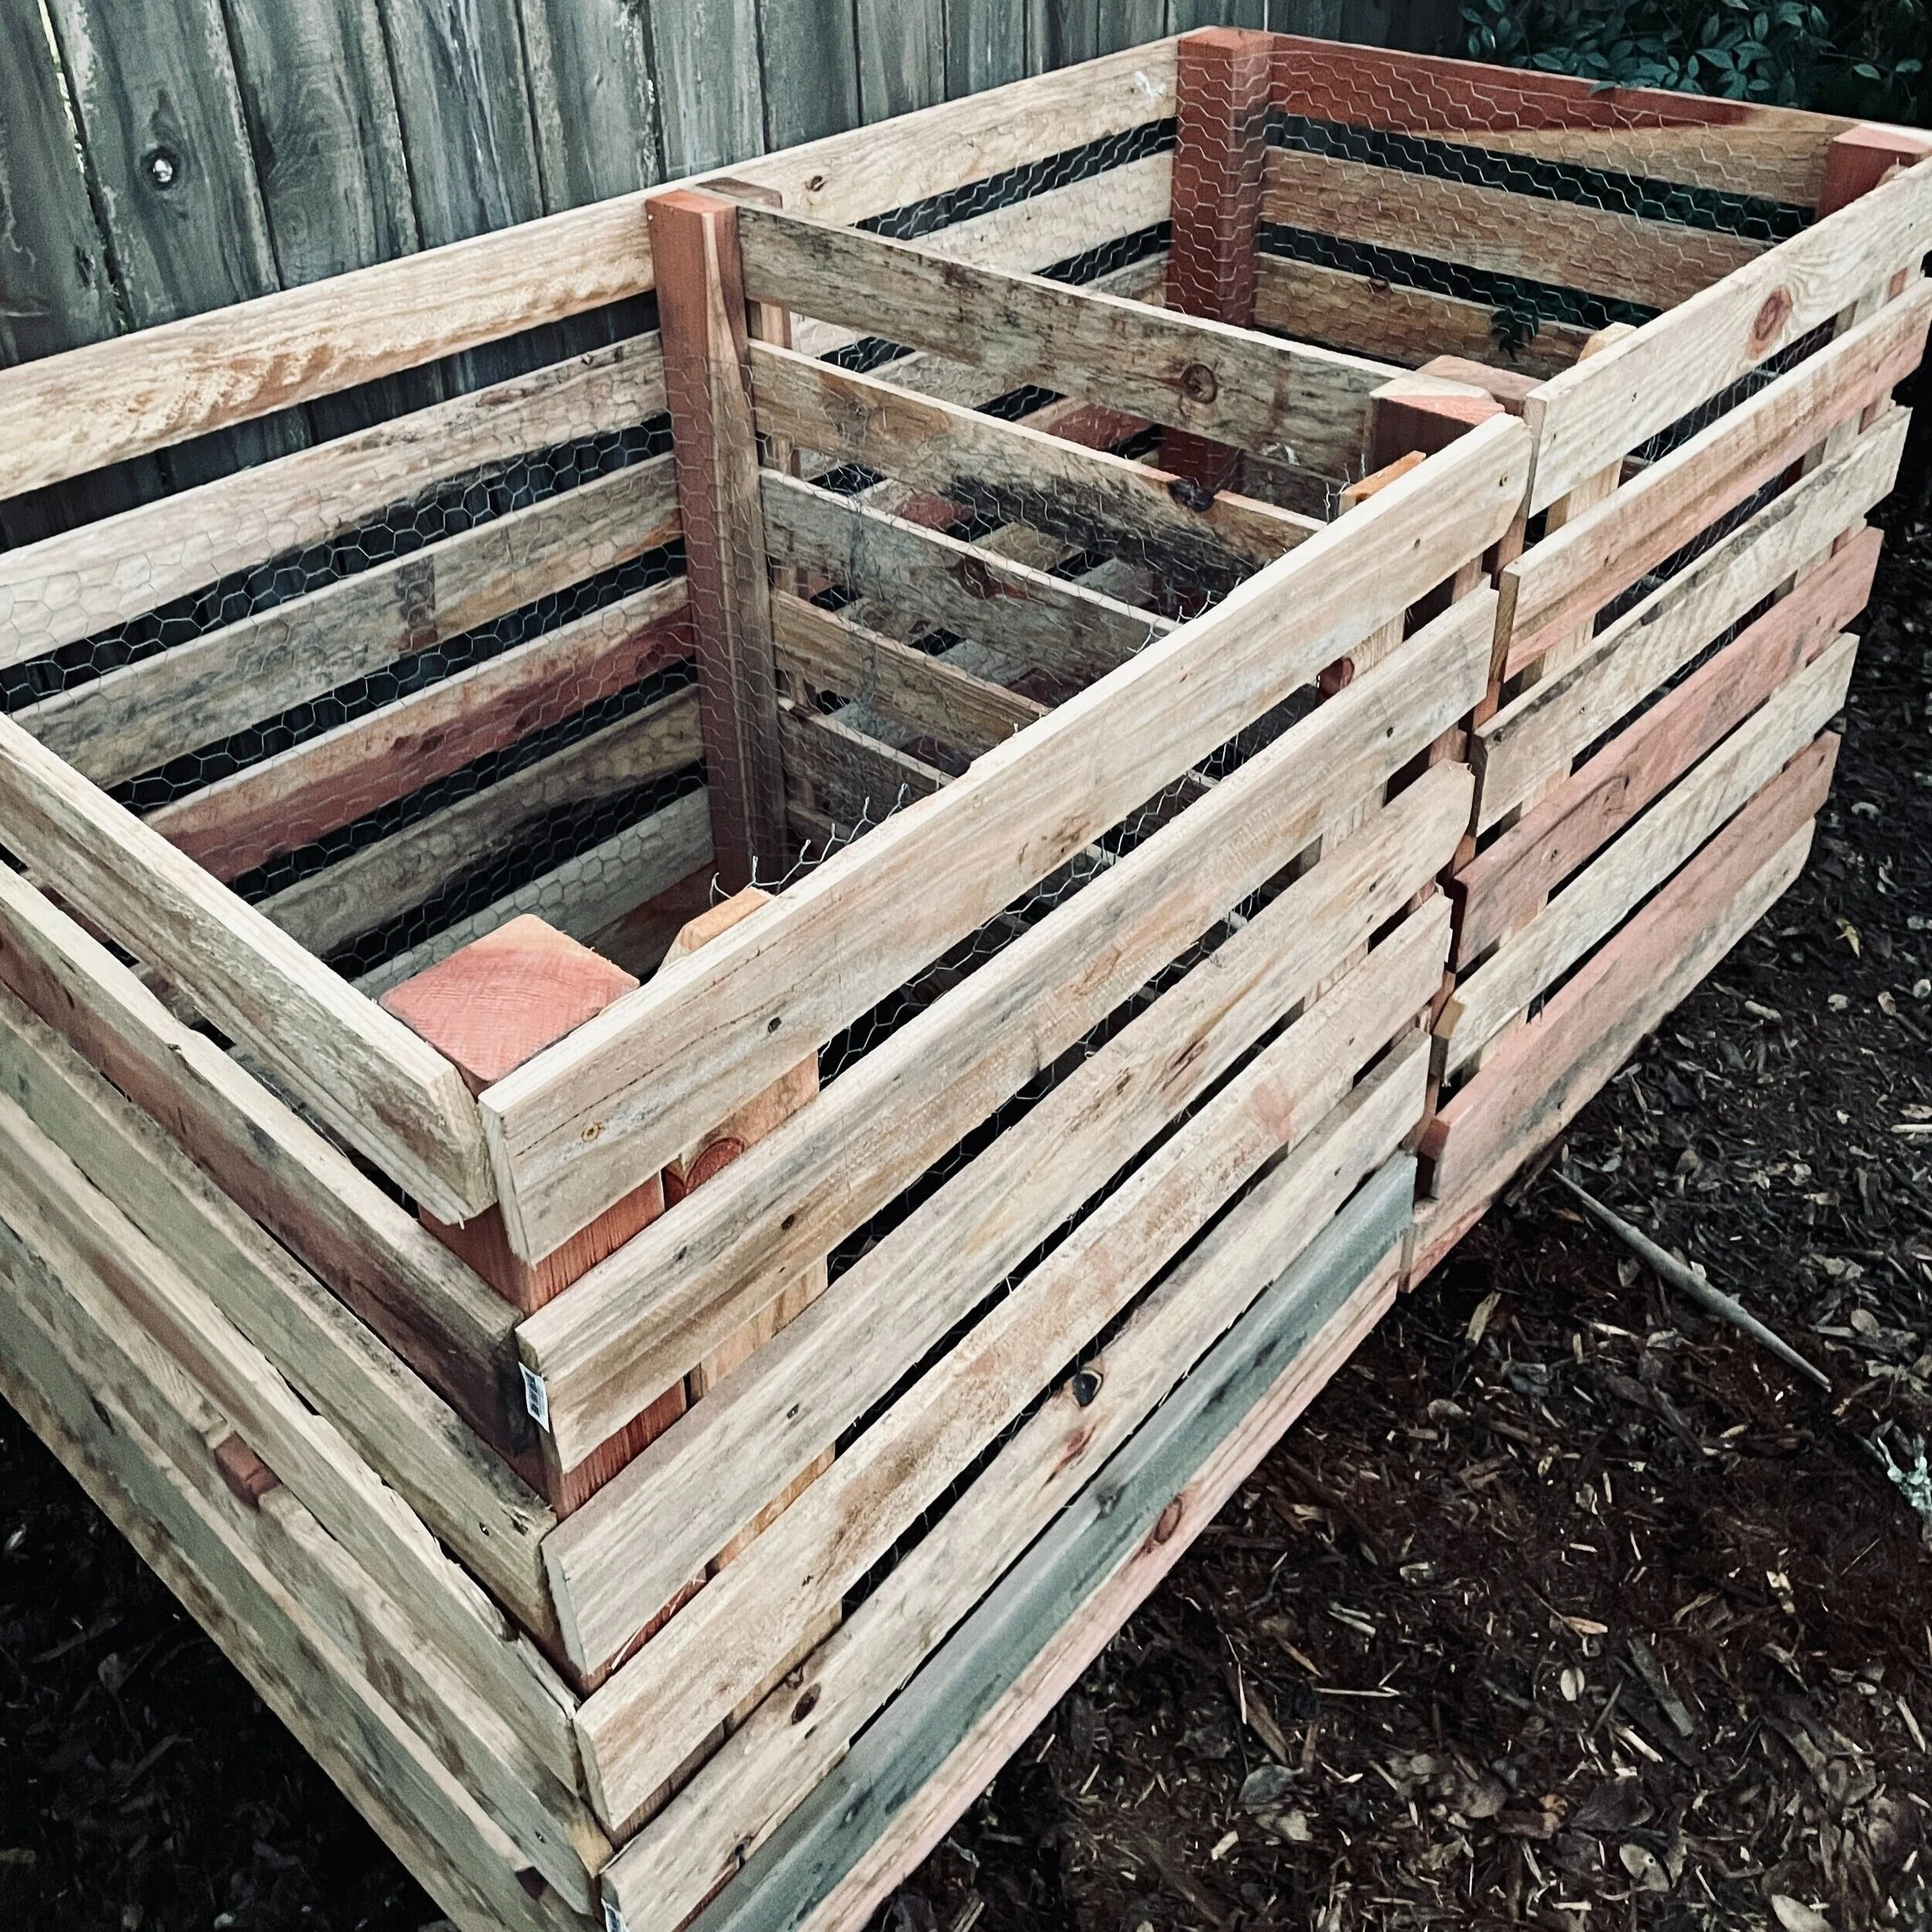
We have built a 2-bin compost system that is 6 feet wide, 3 feet deep and 3 feet tall with removable doors for ease of maintenance and harvesting of compost. We have used various commercial composters in the past and have always struggled to get a consistent harvest. This dual-bin system we have been using for over a year now and have been consistently getting 2-3 wheelbarrows of compost every 3 months.
Now, you may have some questions and we are here to answer:
Why don’t I just buy a commercial compost bin and save myself the time?
While most commercial compost bins are great they can also be extremely expensive, ineffective, or too small. A DIY compost bin is the best option as it’s completely customizable and allows you the space to work the compost and harvest. This is why building a simple two bin system out of good quality materials is actually the better option.
Why have two compost bins?
Simple answer, hidden in a question, do you want a reliable and consistent source of good ole garden black gold? Single bin compost set ups can work but are challenging to get into a rhythm of year round compost. With a single bin, you essentially find yourself with a never ending, non harvest-able, inefficient system. But with a two-bin system you can have a side that cooks while adding compostable materials to the other.
Do you have more questions for us? Leave us a comment and we will answer!
So now that your ready to build your own two-bin system, keep reading the easy steps below and we will help you get set up with your last ever compost bin and start pumping out that amazing backyard compost.
If you are new to gardening, be sure to check out our Compost 101 article to learn all the basics.
How to Build a Dual Compost Bin
Tools
Chop Saw
Impact Driver/Screw Gun
Tape Measure
Speed Square
Materials
(2) 4”x4”x8’ Redwood Posts
(2) 2”x4”x8’ Redwood Boards
(27) 1”x4”x6’ Dog Eared Redwood Fence Pickets
(1) 25’ Roll of Chicken Wire
Staples (9/16th T50 staples)
(15) 2.5” Exterior Wood Screws
(100) 1.5” Exterior Wood Screws
5 EASY STEPS

Liberty ready to get going and build a DIY Dual Compost Bin
Step 1 - Cut the Materials
Cut (4) 4x4” supports at 36”, Cut (4) 2x4” supports at 36”, and Cut the (20) fence pickets to 36” each (leaving 7 fence pickets whole).
Step 2 - Assemble the Back of the Bin
Using (2) 4x4 posts and the 7 in-tact fence pickets you will begin by spacing the 4x4s 6 feet apart and attach the first picket to be flush to the top and attach to the 4x4 using a 1.5” exterior wood screw. Continue to attach the remaining 6 fence pickets with 2” of spacing between each picket. The last picket will not have a 2” gap. This is to help create a border to contain the finished compost at bottom.
TIP: If you have scrap wood laying around, we recommend cutting a ‘spacer’ or a piece of scrap wood to 2” to speed up the time it takes to measure between each picket.
Attach the center support
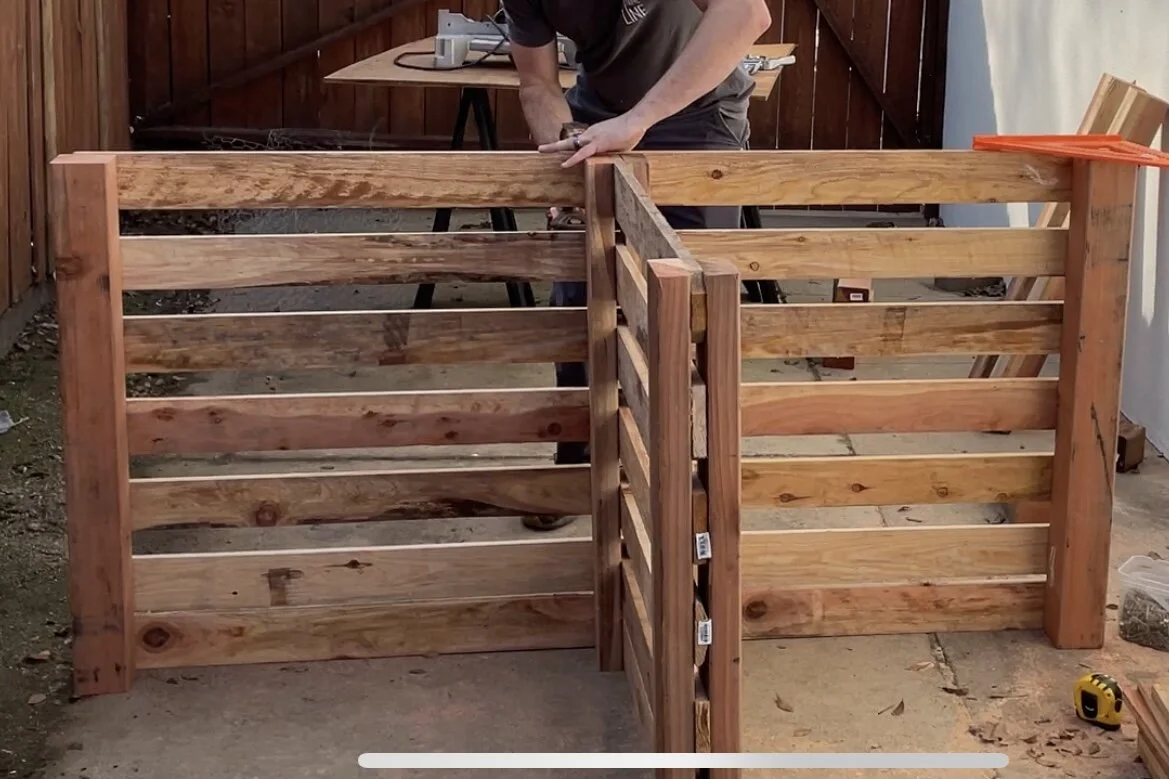
Step 3 - Assemble the Center and Flanks
To first assemble the center, use the 4 pieces of cut 2x4s and 7 pieces of cut fence pickets. Lay out two pieces of 2x4s at 36” apart (measured to the outside). Just like you measured out the back of the bin, lay out the 7 pickets with 2” of space between each board. Then lay the last two pieces of 2x4s on top to ‘sandwich’ the pickets. Drill the boards together using 2.5” exterior screws.
Next, attach the center support to the back. First you will want to measure and mark where the center support will attach to the back piece. To the back of the back piece, mark 36” on each picket. Then line up the center support and attach using the 2.5” exterior screws (for extra support).
Now you are ready to attach the flanks. On the first side, set up the 4x4 at 36” apart from the back panel. Then begin by attaching the top picket, and moving down continue to attach the remaining 6 pickets. Repeat the process on the last side.

Begin Attaching the flanks
Would a video help? You’re in luck.. we have one!
Step 4 - Assemble the Doors
A compost bin is only as good as it’s ability to give you access to the finished goods, and this design has removable doors! These doors are simple to create. First gather the remaining supplies (18 pickets cut to 36”). Then you will attach the base, this piece is permanent and will keep the door in place. Attach a picket to each side and line them up with the bottom of the bins.

Assemble each door
Next, lay out the door. Grab two pickets and lay them vertically with about a foot in between. Then lay 5 pickets from top to bottom with two inches of space between so it matches the rest of the bin. Before attaching with the 1.5” exterior screws, make sure your spacing is correct. You want 4” exposed on the left and right of each (which will leave roughly 20” in between the vertical pickets). Attach everything together with 1.5” screws. Repeat on the second door.
To attach and remove these doors, simply set into the ‘permanent’ posts along the bottom and attach to the 4x4 frame with x2 screws at the top of each door.
Step 5 - Cut and Staple in Chicken Wire
The final step is to attach the chicken wire. Though this is not entirely necessary, it will help in keeping your compost within the bins rather than spilling out. Using a staple gun, (we use this one), attach the chicken wire around each bin, being sure to cut a separate piece for each door so it will be removable without trouble.

Aaaaannnddd that’s a wrap!
This should only take you a simple afternoon of old fashion elbow grease and you can have an amazing dual bin compost system that will help you achieve your backyard self sufficient goals. Check out our other blogs and videos to help you on your compost journey!
If you enjoyed this article, we think you will like these too:
How to Get Finished Compost Faster
Thanks for reading and make sure you find us on our social media channels to let us know how it went!
-Lucas