
Our Seed Starting Set-Up for 2021
This post does contain affiliate links. By clicking the link and making a purchase we receive a small commission at no additional cost to you! This helps us keep the lights on and continue to bring you great content.
Starting seeds is challenging for many gardeners and quite frankly, something we have struggled with for years. Since we began gardening in 2013, we have tried a few different seed starting set-ups but have landed on a simple and small set-up using a pack-away indoor greenhouse. This is not something you need to have to start seeds, but we have found it to be very helpful in retaining additional heat and humidity for our seeds to germinate (plus it keeps the cats out). We will briefly go over the science behind what seeds needs because it will help you understand why we chose the products we did. Then we are simply going to dive into what we are using this year and continue to update you all on how it’s working. Below we show you exactly what we purchased, why we purchased and tips on starting seeds in 2021.
What do Seedlings Need?
Seeds don’t need much to germinate other than the correct soil temperature and moisture - though each variety of seed is different in their needs, most seeds like a soil temp between 65-75 degrees Fahrenheit.
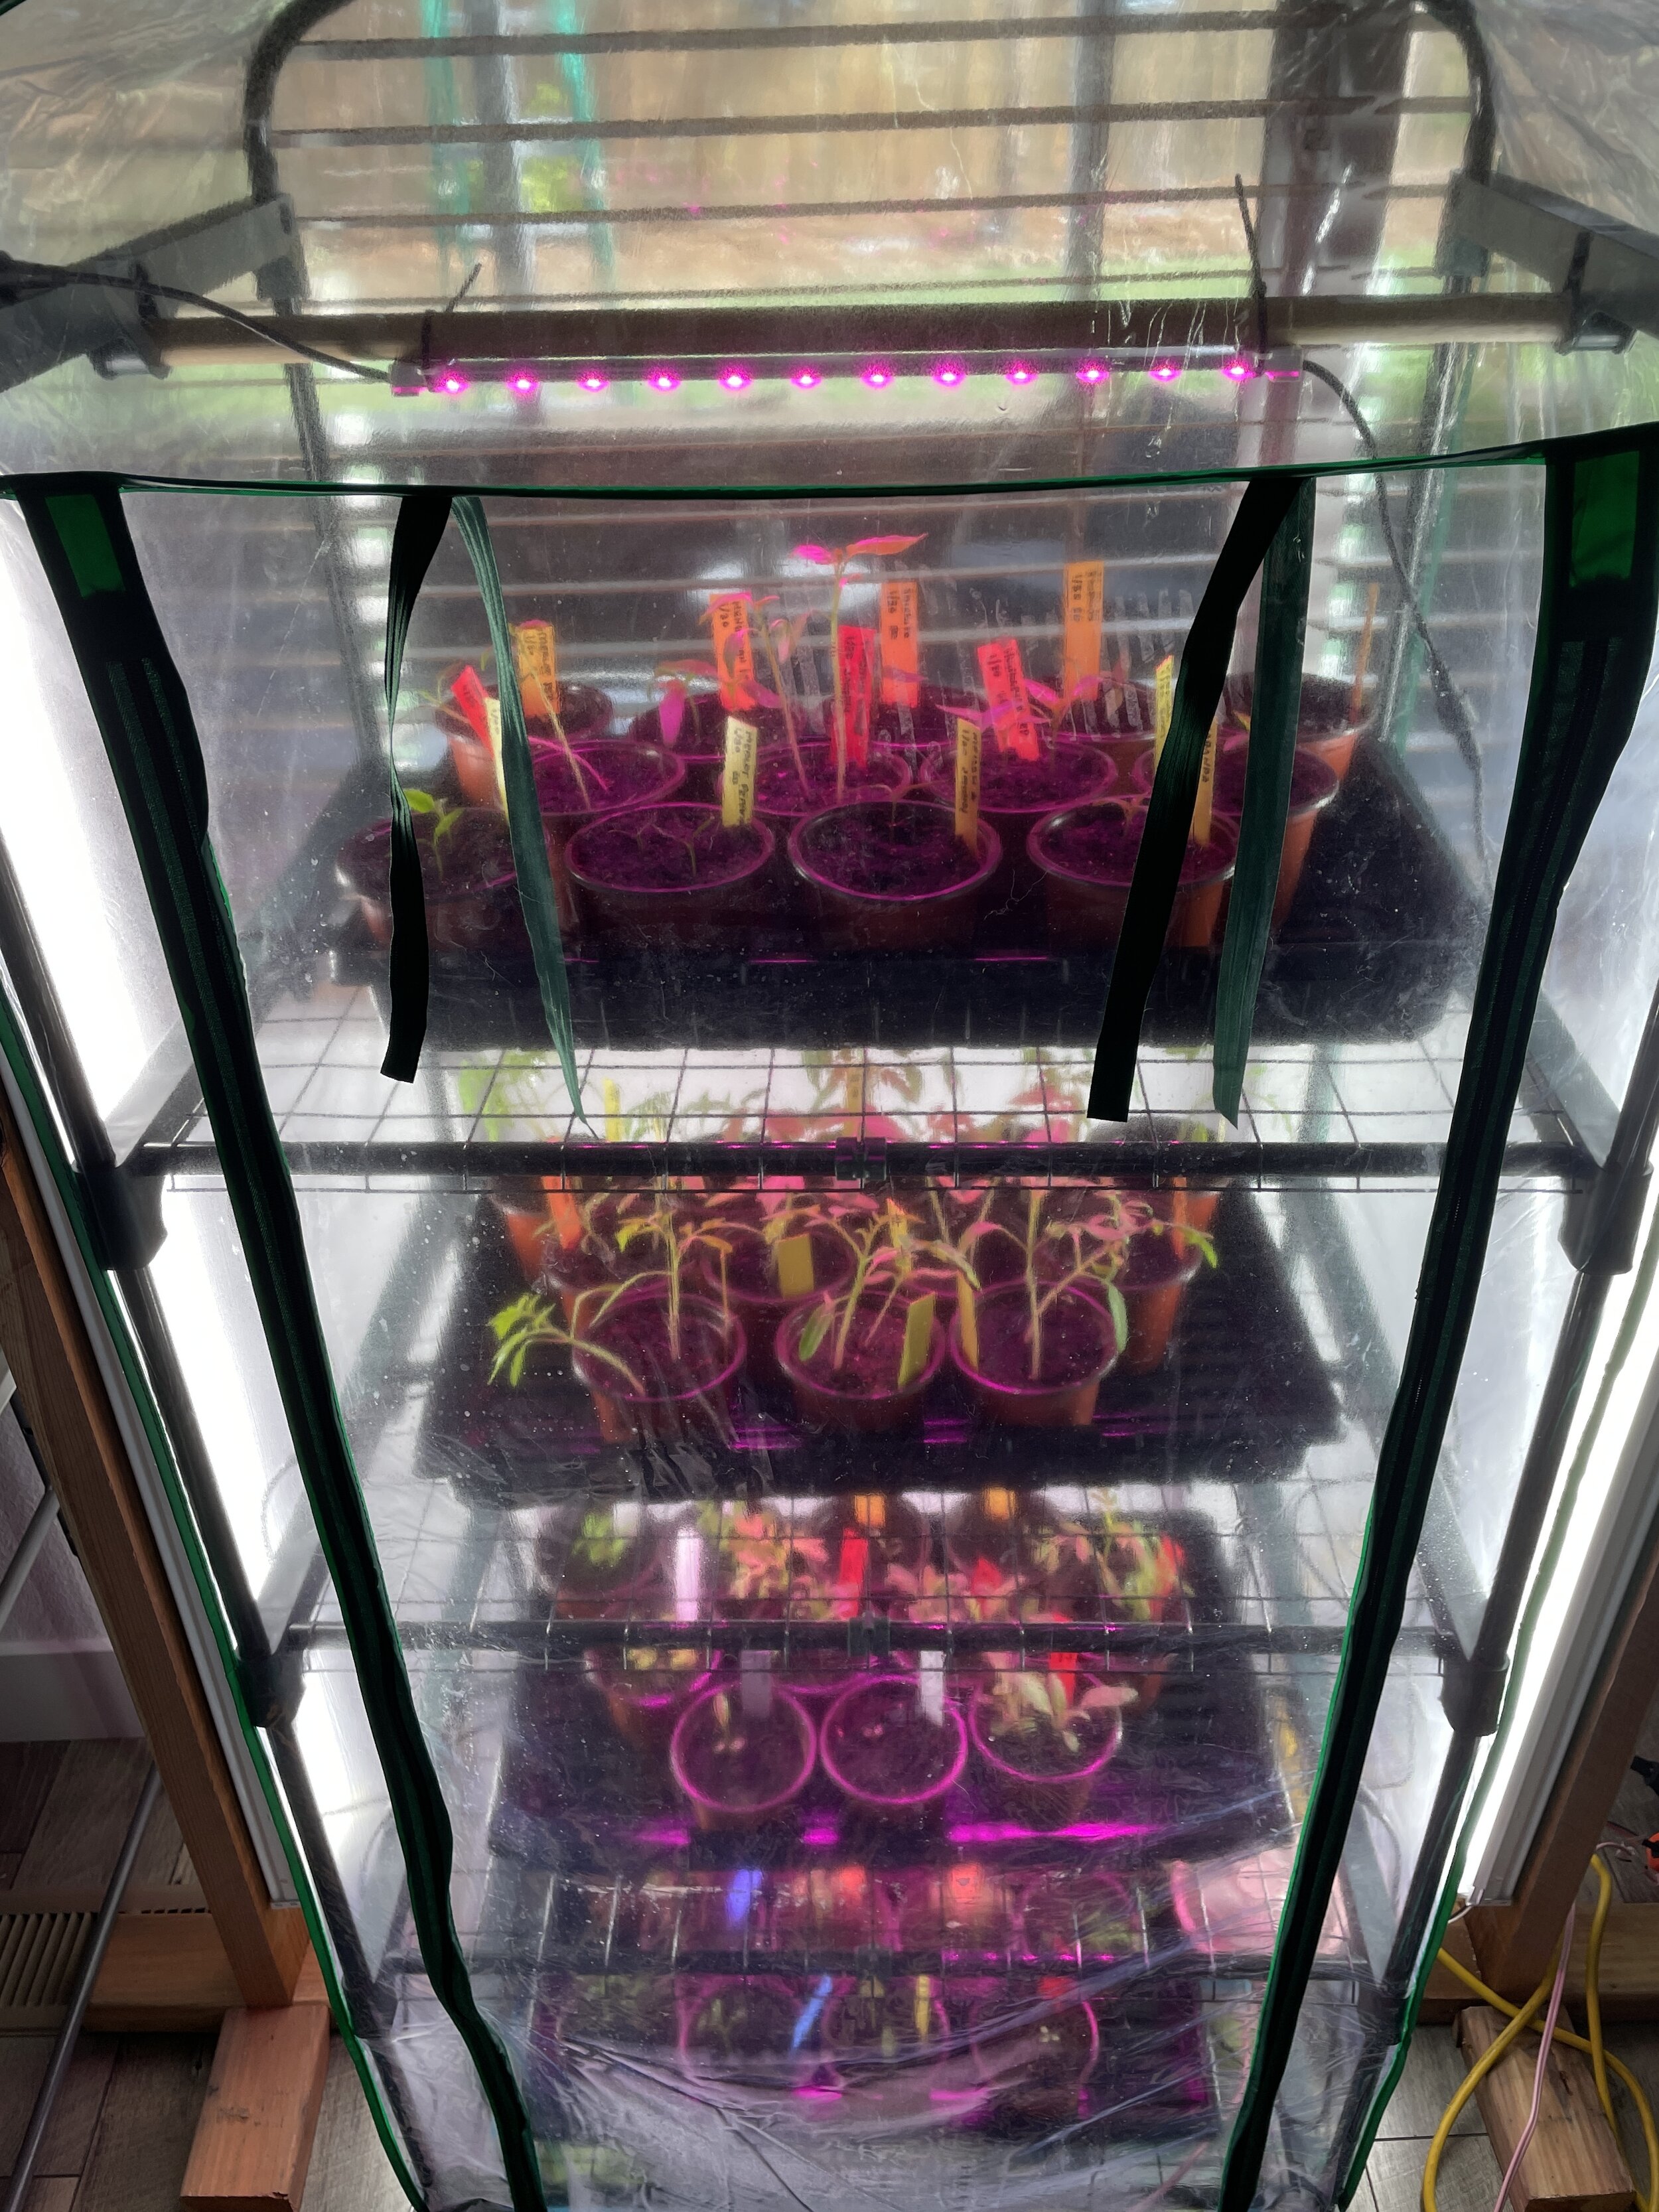
Our indoor seed set-up for 2021
Once seeds germinate, light is the next biggest hurdle. Speaking in regards to vegetable seedlings, seedlings need a LOT of light to grow properly. A sign of not enough light is leggy, floppy seedlings that do not transplant well nor will produce great fruit. Leggy seedlings have always been a struggle for us and is something we are really focusing on this year. So how much light do seedlings need? Well, in general, seedlings need between 14-16 hours of light a day and because we are starting seedlings when the sun does not shine for that many hours, we have to use grow lights.
When choosing grow lights it is very important to select lights that replicate the sun - and spoiler alert, most lights that advertise as ‘grow lights’ do not always do this! We actually purchased lights for this year without double checking and when we did more research learned that we did not have the adequate amount of light necessary and we added additional lights to our set-up. So don’t be like us, and do the research ahead of time. You will want grow lights to have a certain lumen and kelvin rating. Kelvin is the most important (4500 - 6000) as this ensures plants are getting the full spectrum of light.
Perhaps obvious, but seedlings also need water and should never dry out until established. We find it best to bottom water and let the soil soak it from the bottom up- this way the act of pouring water will not disturb the vulnerable seed or seedling. Once the water has been absorbed it is important to remove the excess water to prevent mold or mildew growth.
And lastly, seeds should to be started in a specific soil. This year we started our seeds with Jiffy Seed Starting Mix (we found at Home Depot) and have had great success. We have also heard that indoor potting mix can work - but we have never tried this personally. What we DO know is to never start seeds with soil that has been outdoors already (like soil from your garden). This ‘used’ soil is dangerous to new seedlings because it can harbor diseases and bacteria that could kill the fragile little plant.
Another question we hear frequently is: “Do I need to fertilize my seedlings and how often should I do it?” And in short, the answer is yes and to follow the directions on the fertilizer. This year we are using Dr. Earth Pure Gold All Purpose Plant Food and fertilizing weekly. When looking for a fertilizer for your seedlings you just want to look for one that is a 1-1-1 or 2-2-2 (for NPK). This will give your seedlings a balanced amount of nutrients to grow strong.
Seed Set-Up
4-Shelf Collapsible Greenhouse
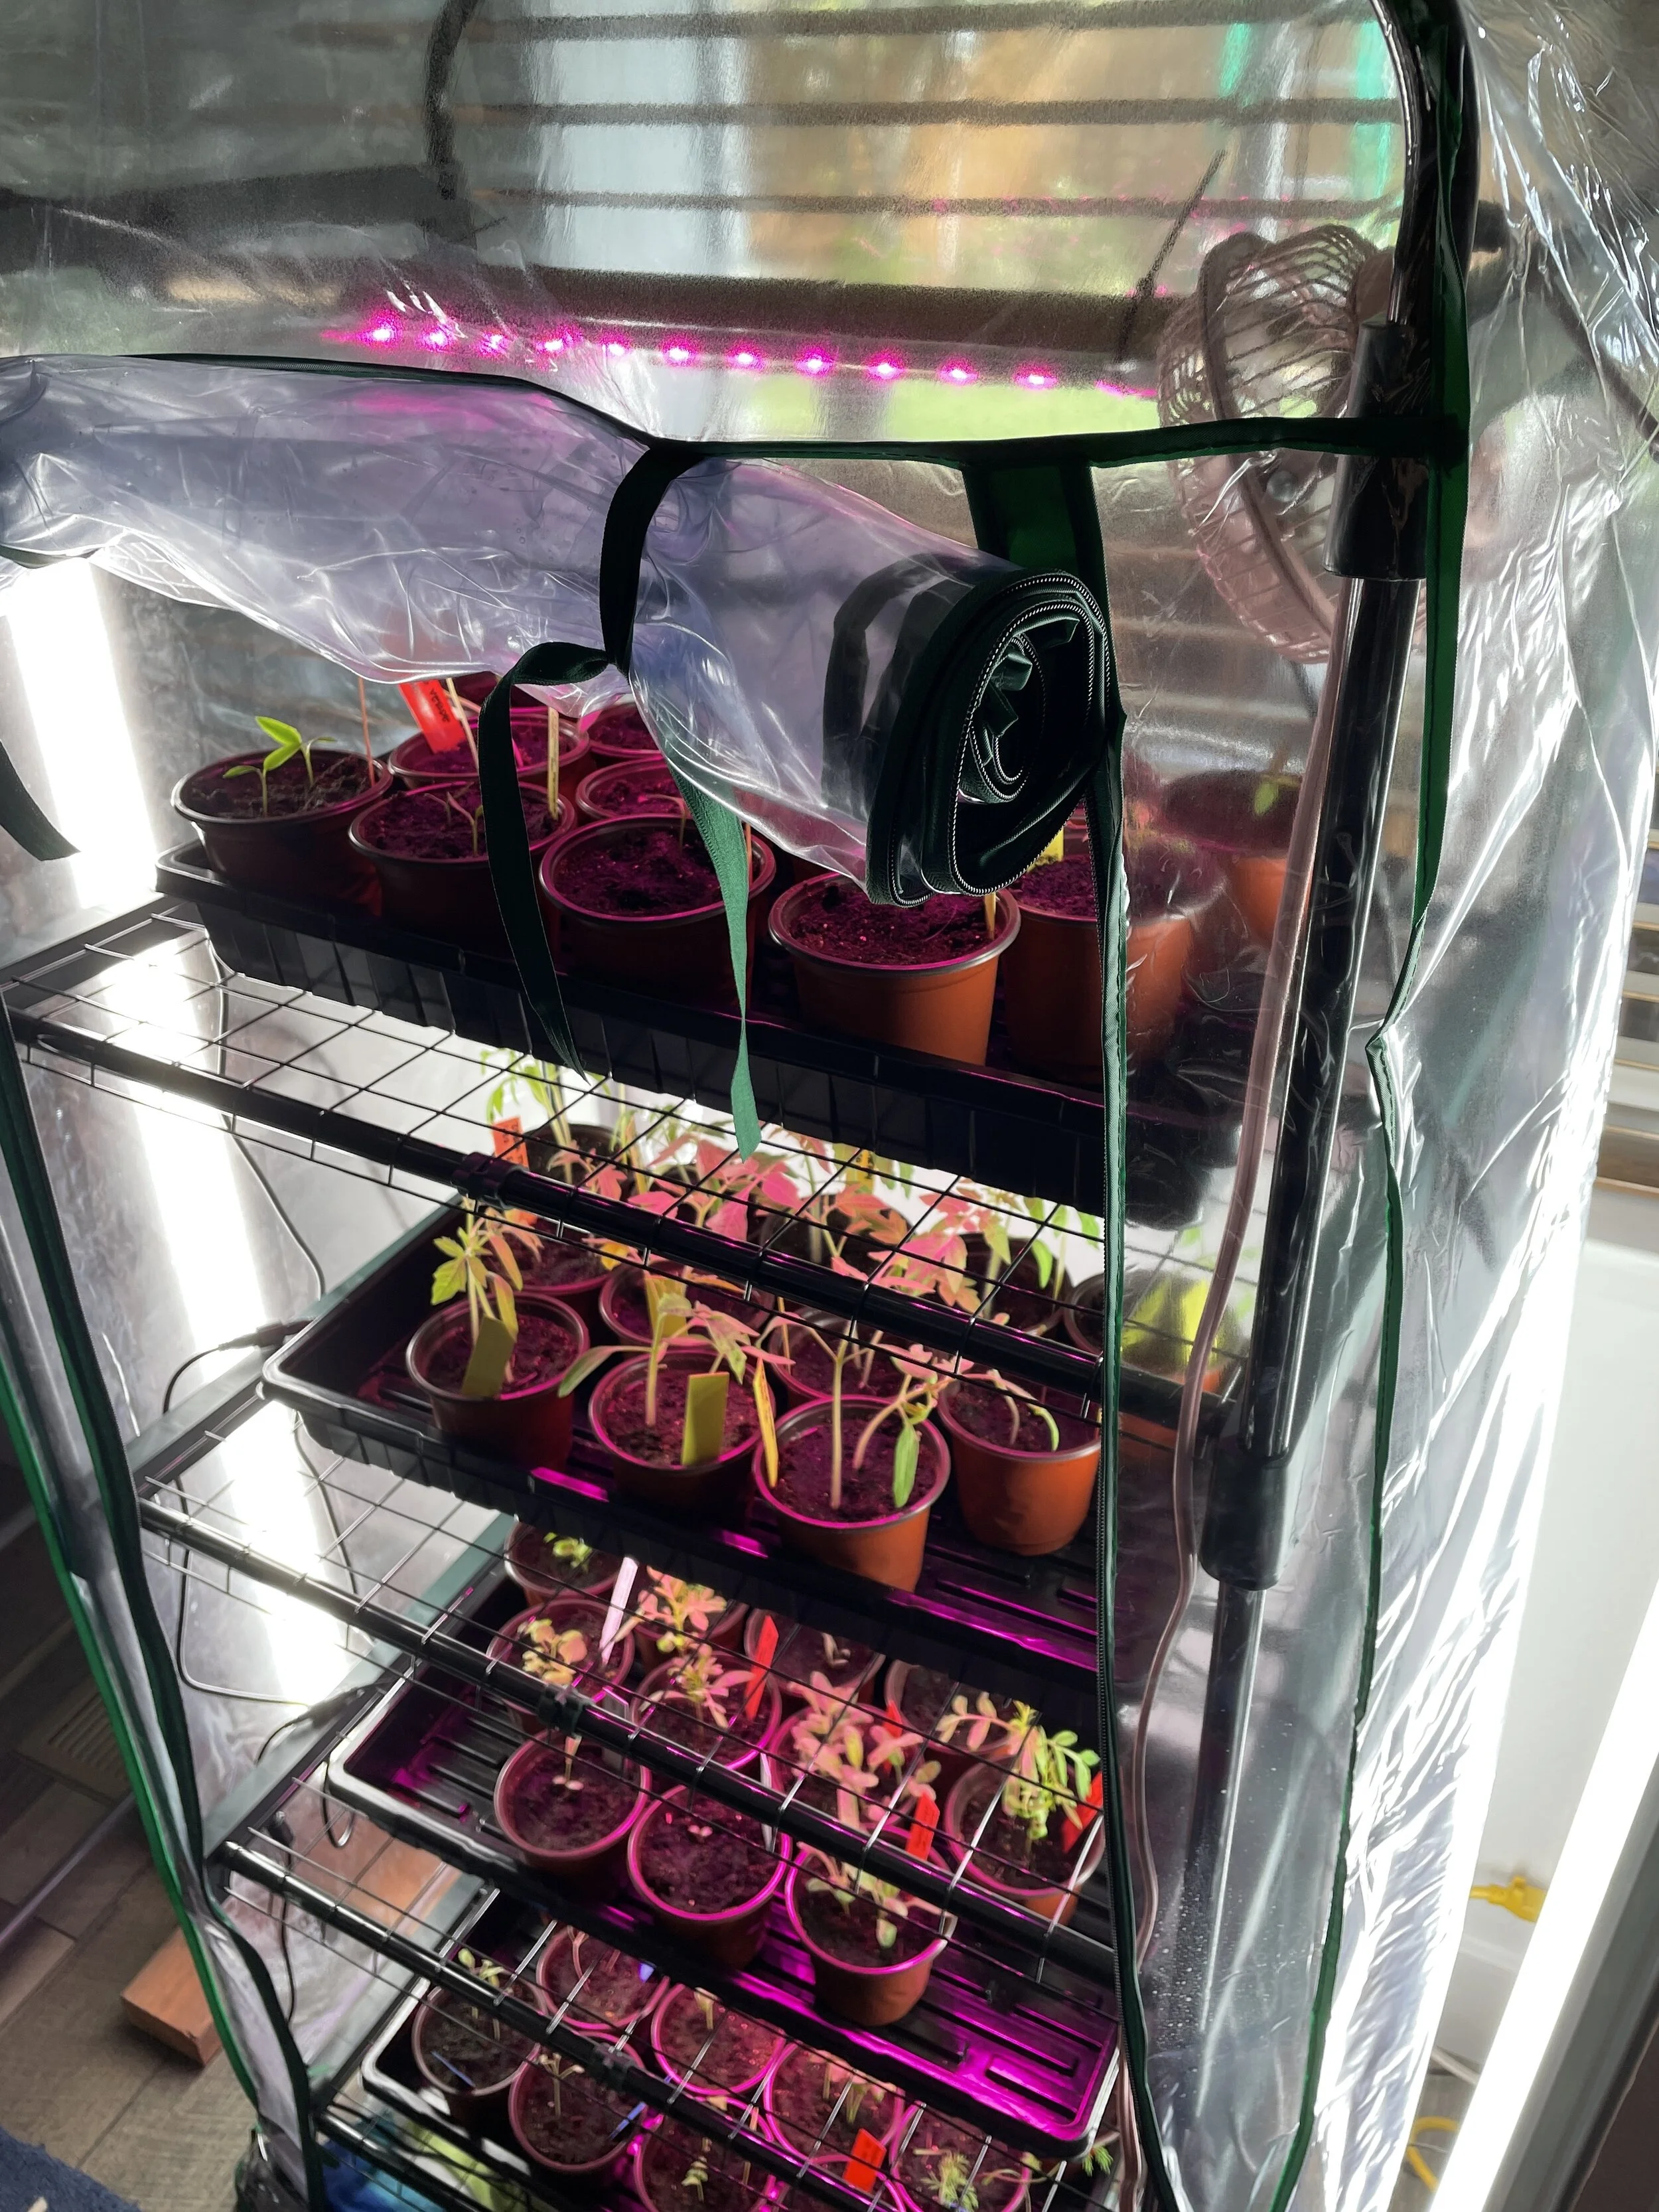
Why we love it: We love this mini indoor greenhouse because it isn’t permanent. One day we would love to have a larger outdoor setup, but that’s just not realistic currently. So this mini greenhouse works great because it breaks down and can be stored when not in use. It has four shelves so ample space to start a large number of plants - this year we are starting with 56 (14 on each shelf) but one could start more. The frame is made of aluminum, so relatively durable, and is wheeled so easy to move around. The outer plastic fits well and has zippers to open. Once the seeds have all germinated it is easy to zip up and tie up to allow for more airflow, or simply remove.
Grow Lights
Why we love these: So the grow lights linked here are the ones you should buy for this greenhouse! Like I said previously, we messed up and purchased ones that didn’t end up having the correct amount of light for seedlings. After researching more, we found these that have 24” 6,000 kelvin, 2340 lumen and comes in a 4-pack (so perfect for the greenhouse above!) and that will support the proper growth of your vegetable seedlings. Like I said earlier, we are only starting 56 seedlings in 4” pots this year and if you were to double it I would recommend doubling the lights to prevent leggy seedlings.

Tomato Seedlings 2 weeks after germination
Seed Cups
Why we love these: We have always struggled to up-pot our plants (perhaps in part because our seedlings were always leggy). We had the space in our mini greenhouse so opted to start seeds in 4” round pots which would skip the step of up-potting and allow us 8 weeks of growth before planting directly into our garden. We like these because they are durable and won’t break if you accidentally squish them and are reusable from year to year.
Plastic Trays
Why we love these: These trays are the perfect size for the greenhouse. Once could actually fit two trays per shelf if you wanted to and had enough light to support that many plants. These trays are super durable and reusable. They also do not have holes in them so we simply just water into these trays which allows the seed cups (that do have holes in them) to suck up the water. After a few hours or the next day we use a wet shop vac to vacuum up the remaining water out of the trays.
Fan
Why we love this: This small fan is the perfect size to fit inside the green house. A fan is a great addition to the greenhouse seed starting set-up because it will circulate the humid air and prevent excess moisture from sitting on everything - which helps prevent mold and mildew buildup. Once the seedlings get bigger you can also use this fan to simulate wind and stimulate the seedlings to grow stronger stems.

Fan set-up inside the greenhouse. Most of the time is it set straight up to circulate air.
Timer
Why we love this: Every greenhouse setup needs a timer. This allows you, the grower, to ‘set it and forget it’ sort to speak. Simply set the timer to the recommended 16 hours of light. For example, our lights turn on at 6 am and automatically turn off and 11 pm. This way if we fall asleep early or wake up late we don’t have to worry about the seedlings not getting enough light. Plus, consistency for your little seedlings is key for their growth success!
We hope this article proved useful for you in starting seeds indoors. Though we don’t claim to be experts, we feel we have done enough trial and errors to at least determine what not to do. Starting seedlings isn’t too hard and shouldn’t cost a lot of money. It allows you to try new plants that you normally can’t find at the nursery - which is super fun! Comment below if you have any questions or suggestions for us to try - and don’t forget to friend us on Instagram so we can share in your seed starting endevours!
Happy planting,
Beth & Lucas