
4 Easy Steps to Build Steel Raised Garden Beds - DIY
This post does contain affiliate links. By clicking the link and making a purchase we receive a small commission at no additional cost to you! This helps us keep the lights on and continue to bring you great content.
Struggling to find a raised bed for your garden that is affordable, large, and will last forever? Well, you’ve come to the right spot. For about $75 and just a couple hours, you can build a product better than anything you’ll buy commercially.
Why Build raised garden beds?
Raised beds give you better control of the environment for your plants - to include the soil composition, moisture levels, and better weed control.
Why galvanized steel raised beds?
They are less expensive than all wood construction raised beds and the galvanized steel won’t rot or rust.
Why build a 4x8’ raised bed?
To minimize material waste. The materials and cut list for this project will build a 4’x8’ raised bed that is 13” tall with minimal waste. However, with a little creativity you can customize the size to fit your exact needs!
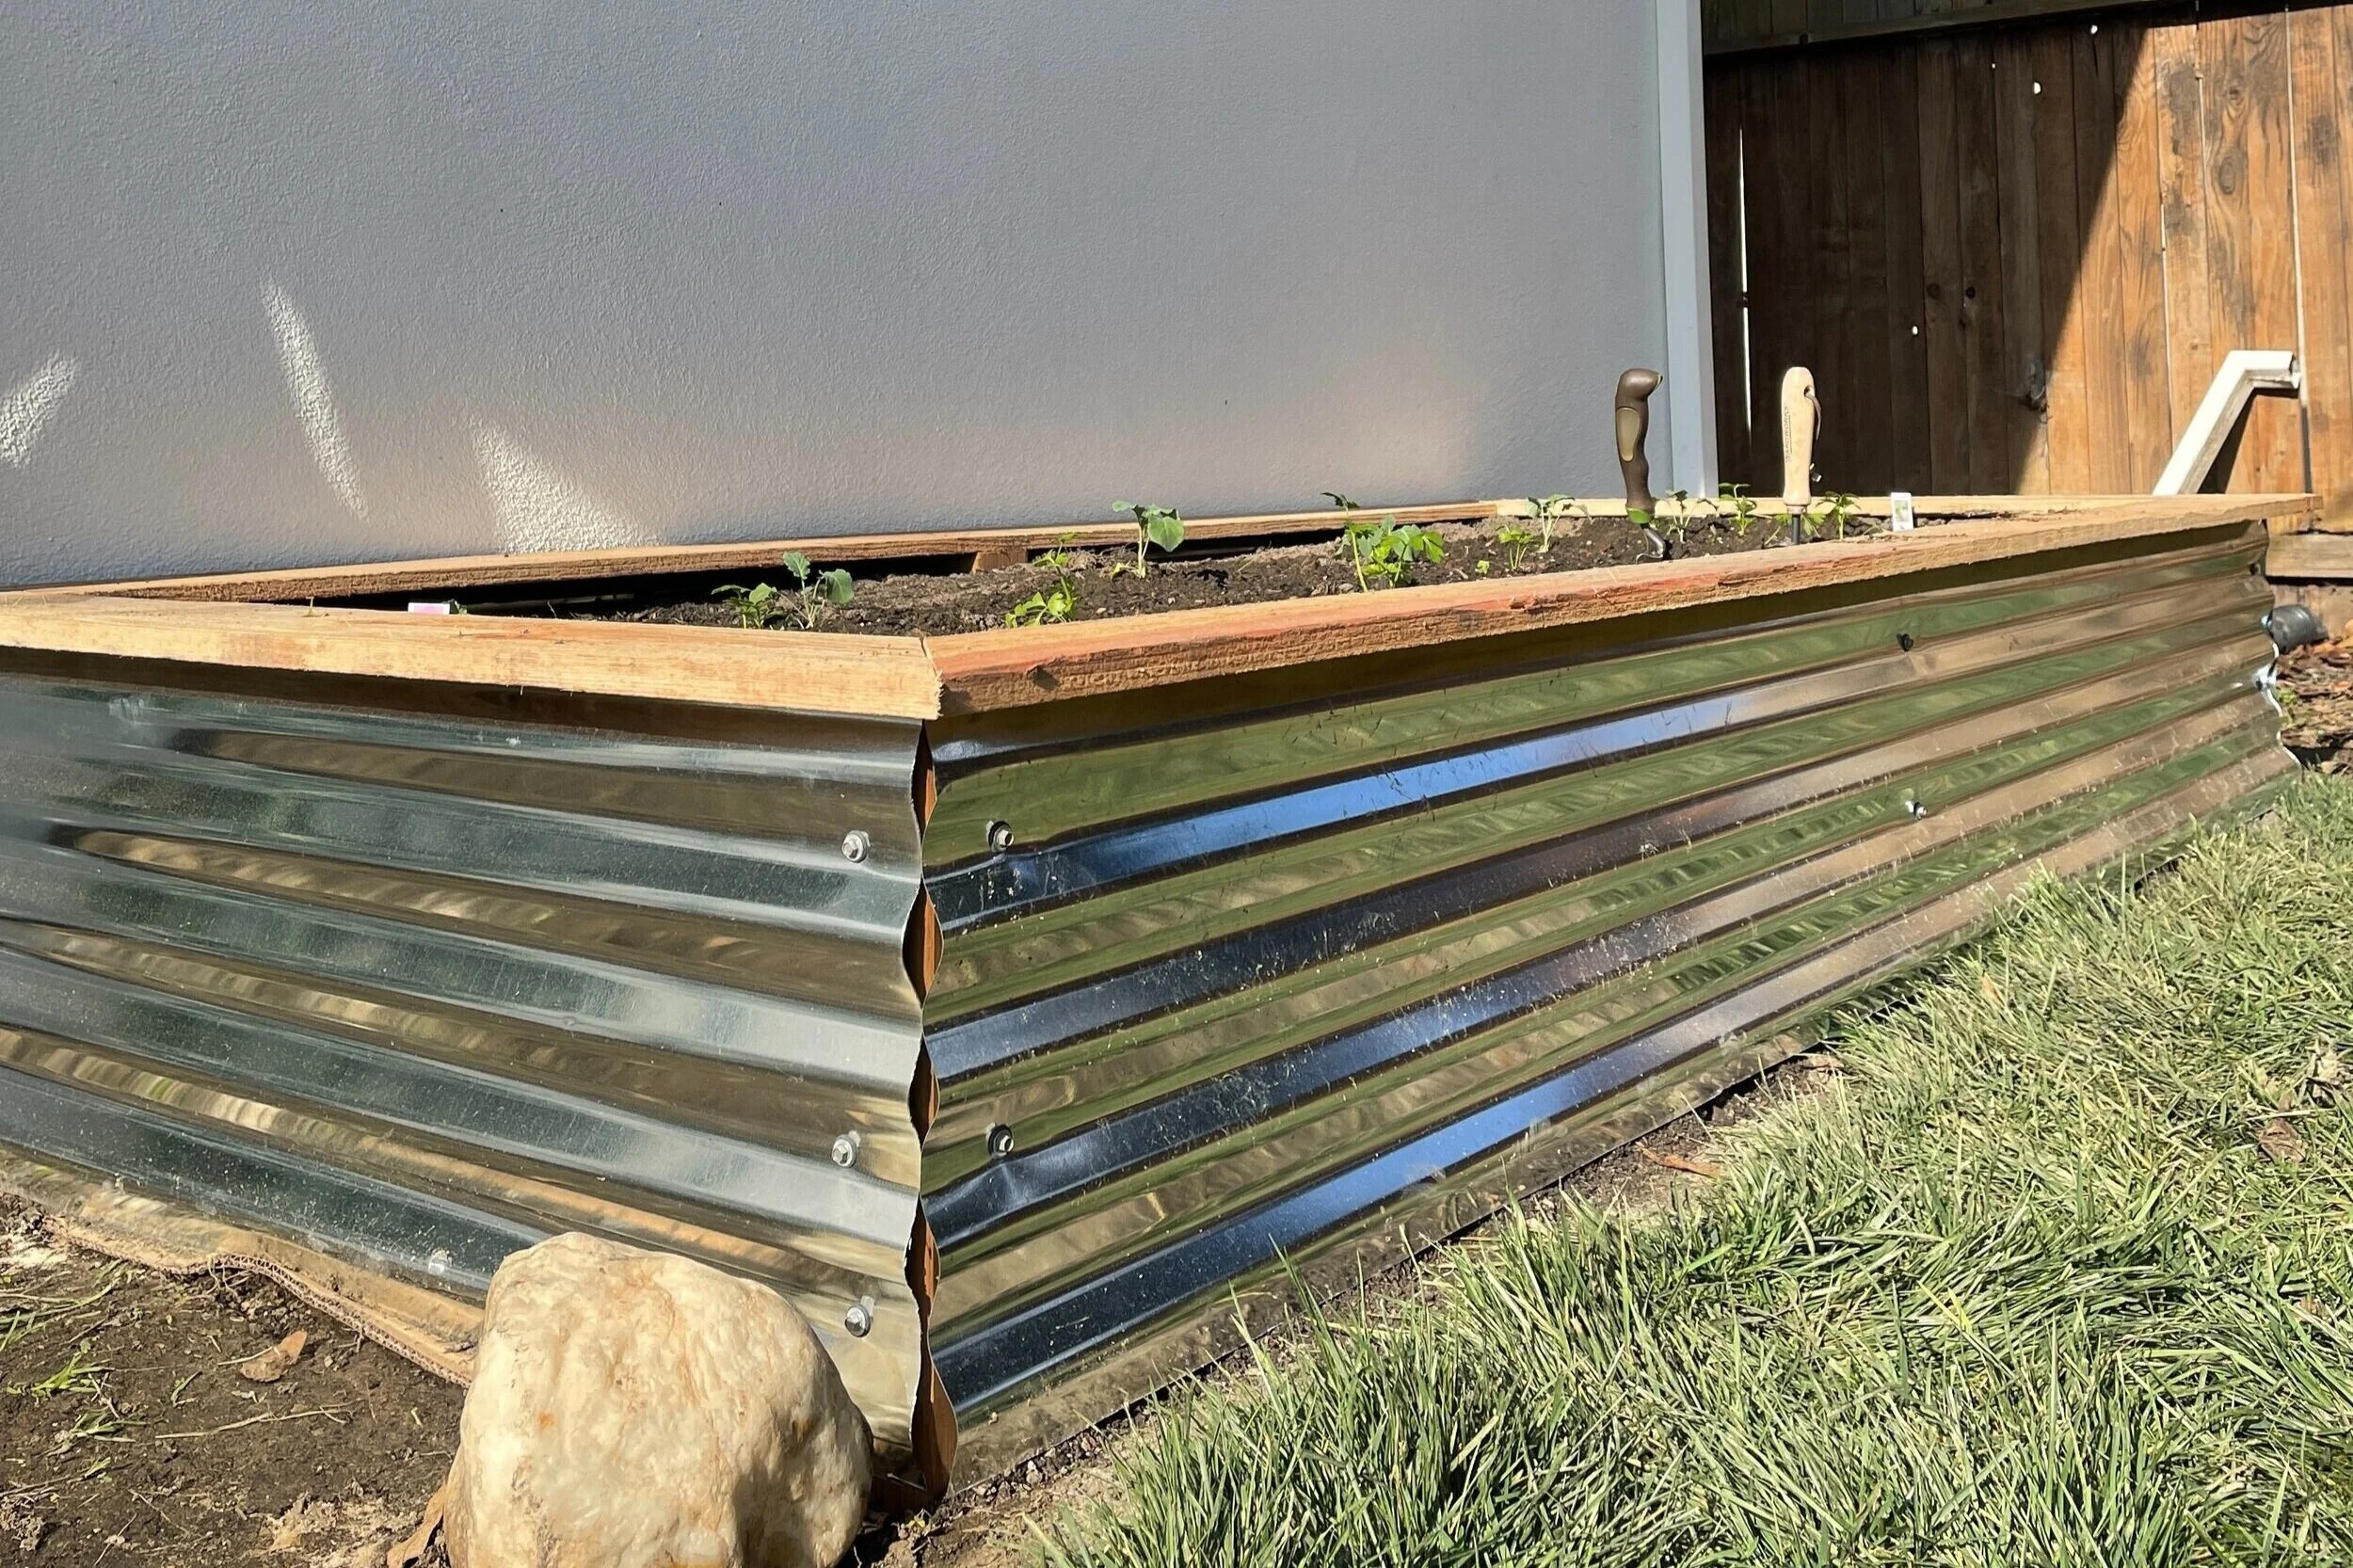
DIY Raised Garden Beds
DIY Raised Garden Beds
Tools:
Miter Saw/Circular Saw
Screw Gun/Impact Driver
Angle Grinder w/ metal cut off wheel
Tape Measure
Speed Square
Pen/Pencil
Safety Goggles and Hearing Protection
Materials:
(1) 26” x 12’ Corrugated Galvanized Steel Roof Panel
(1) 4”x4”x8’ Redwood post
(3) 1”x6”x8’ Redwood board
(10) 1.5” Exterior Wood Screws
(20) 1” Steel Roofing Screws
4 STEP BUILD:
ONE: Cut (6) 14” supports from the 8 foot long 4”x4”
TWO: Cut the roof panel in half lengthwise. The 12’ panel is actually 26 1/4” wide so we will make marks at 13 1/8”. Using the angle grinder cut the panel down the middle.
Next, we will cut the long ends at 92” and then cut the short ends at 44”
* I get what you’re saying right now, “that’s not 4’x8!” We are doing this to allow for the caps on top to sit flush and minimize non plantable space.*
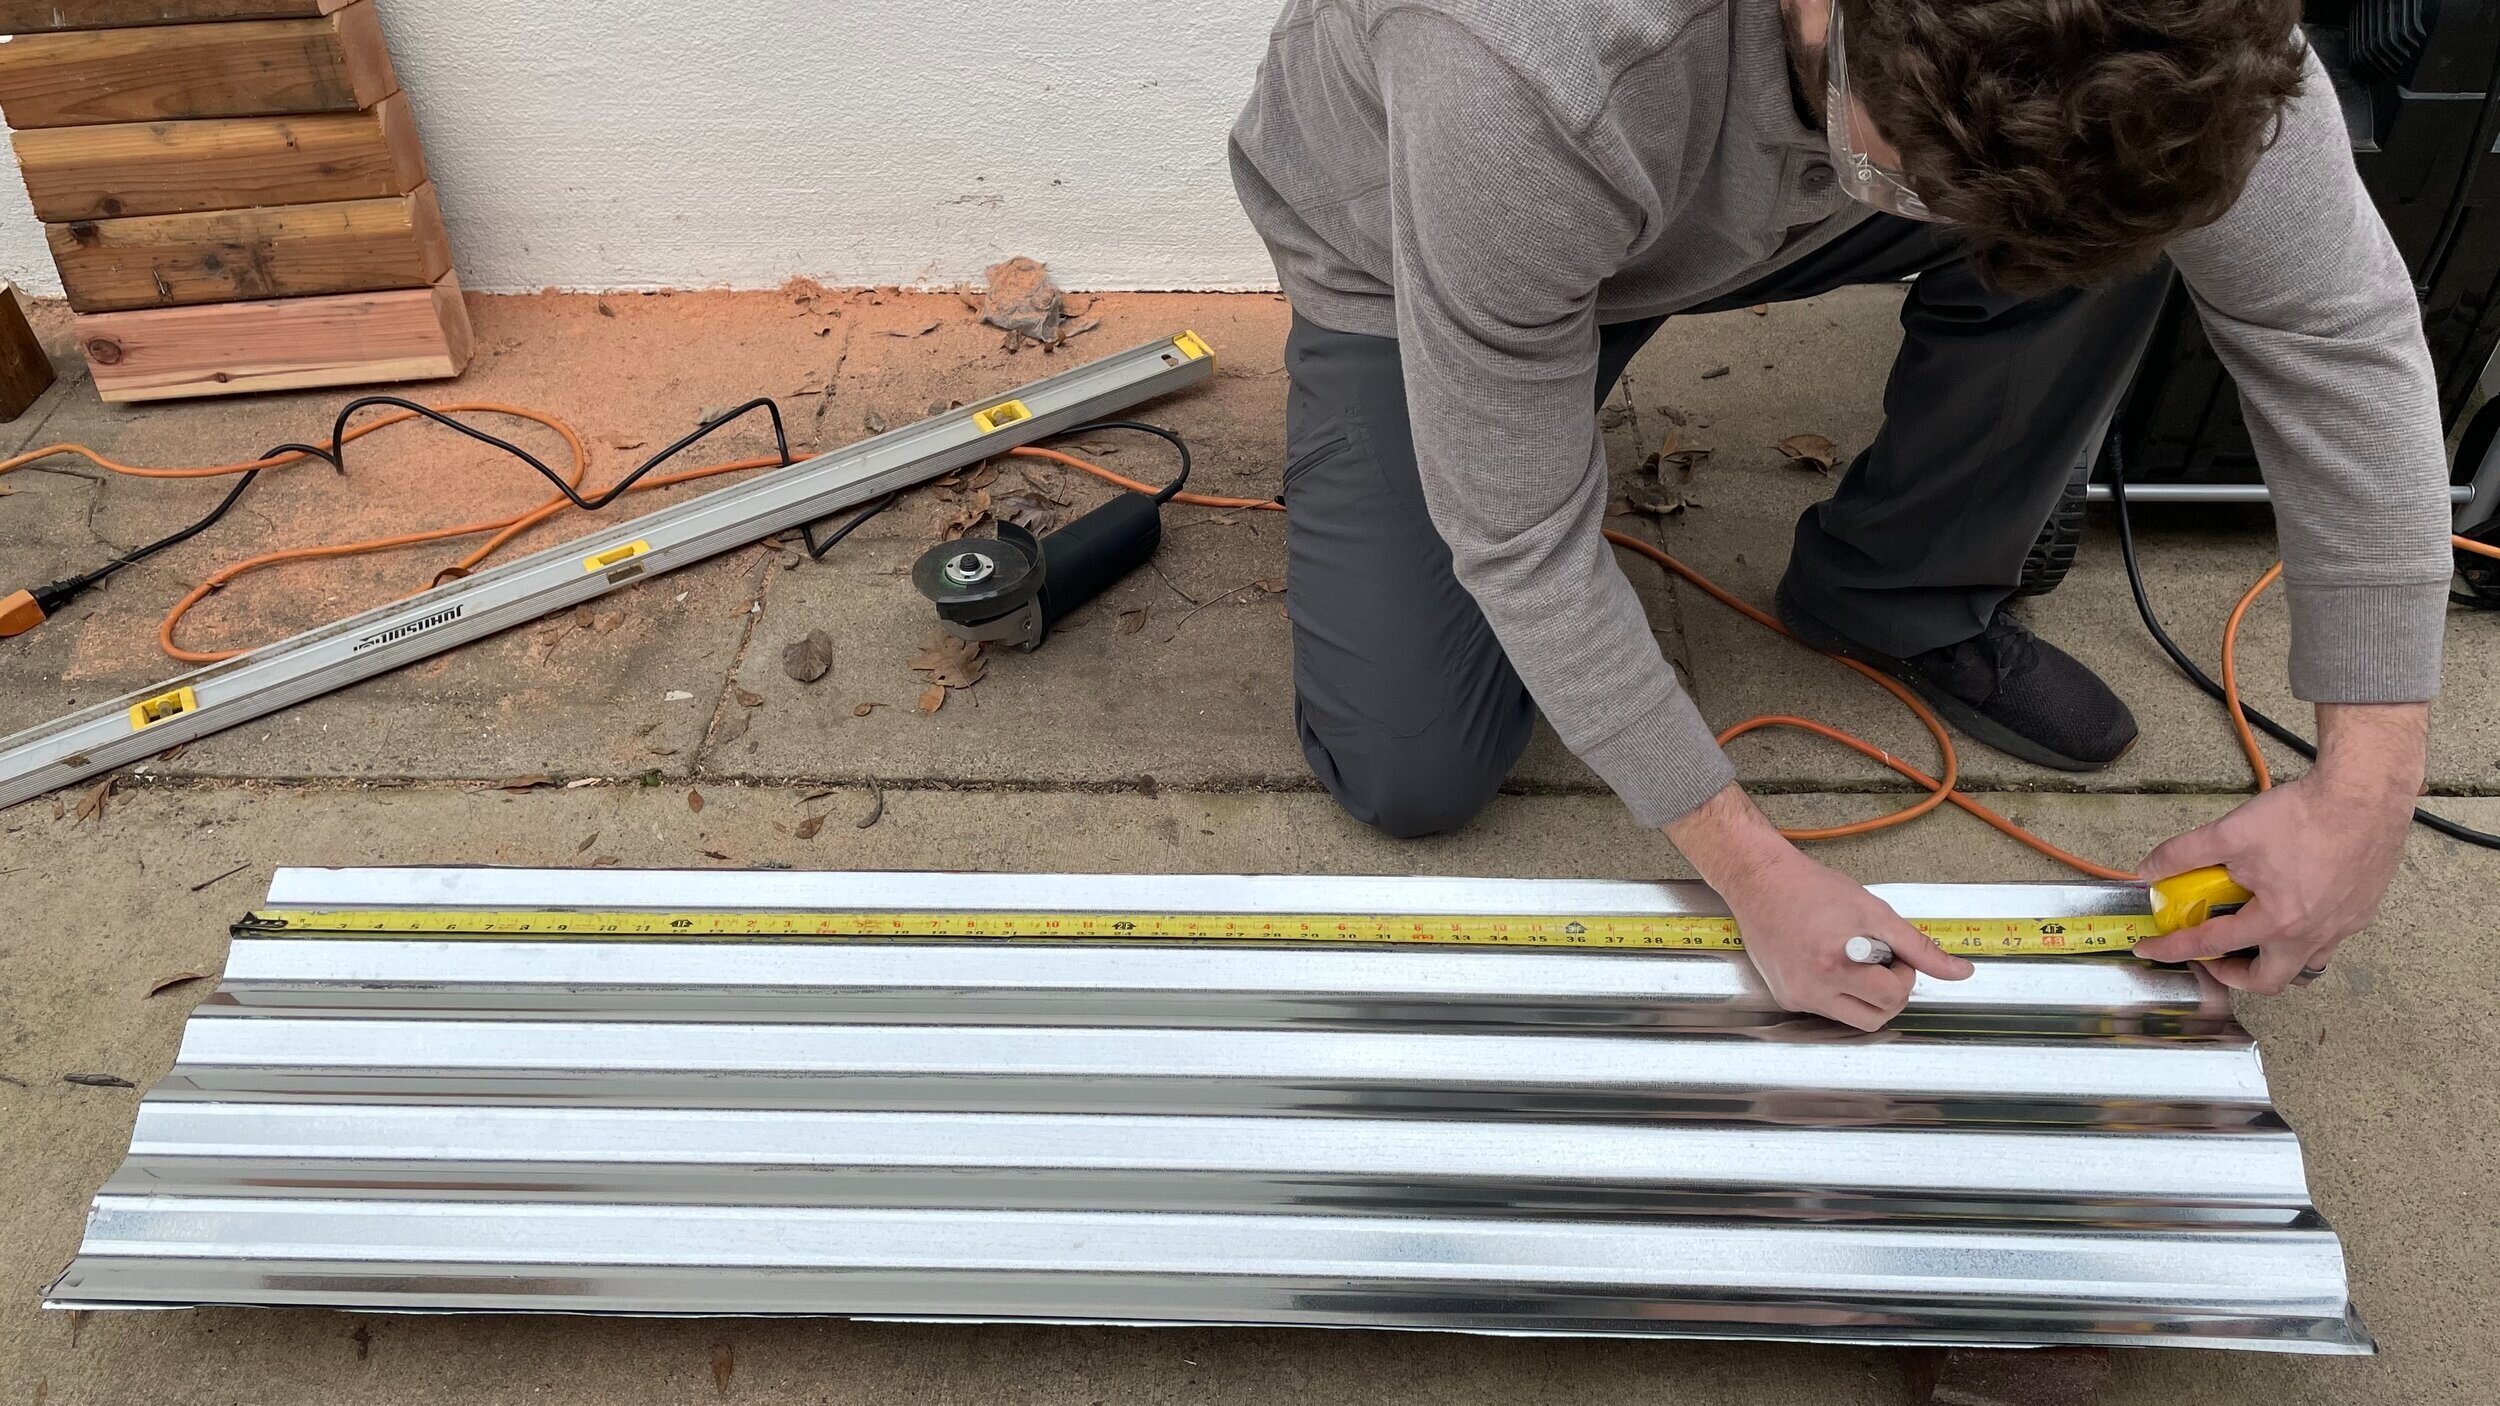
DIY Raised Garden Bed Step 2: Cut the metal roof panels
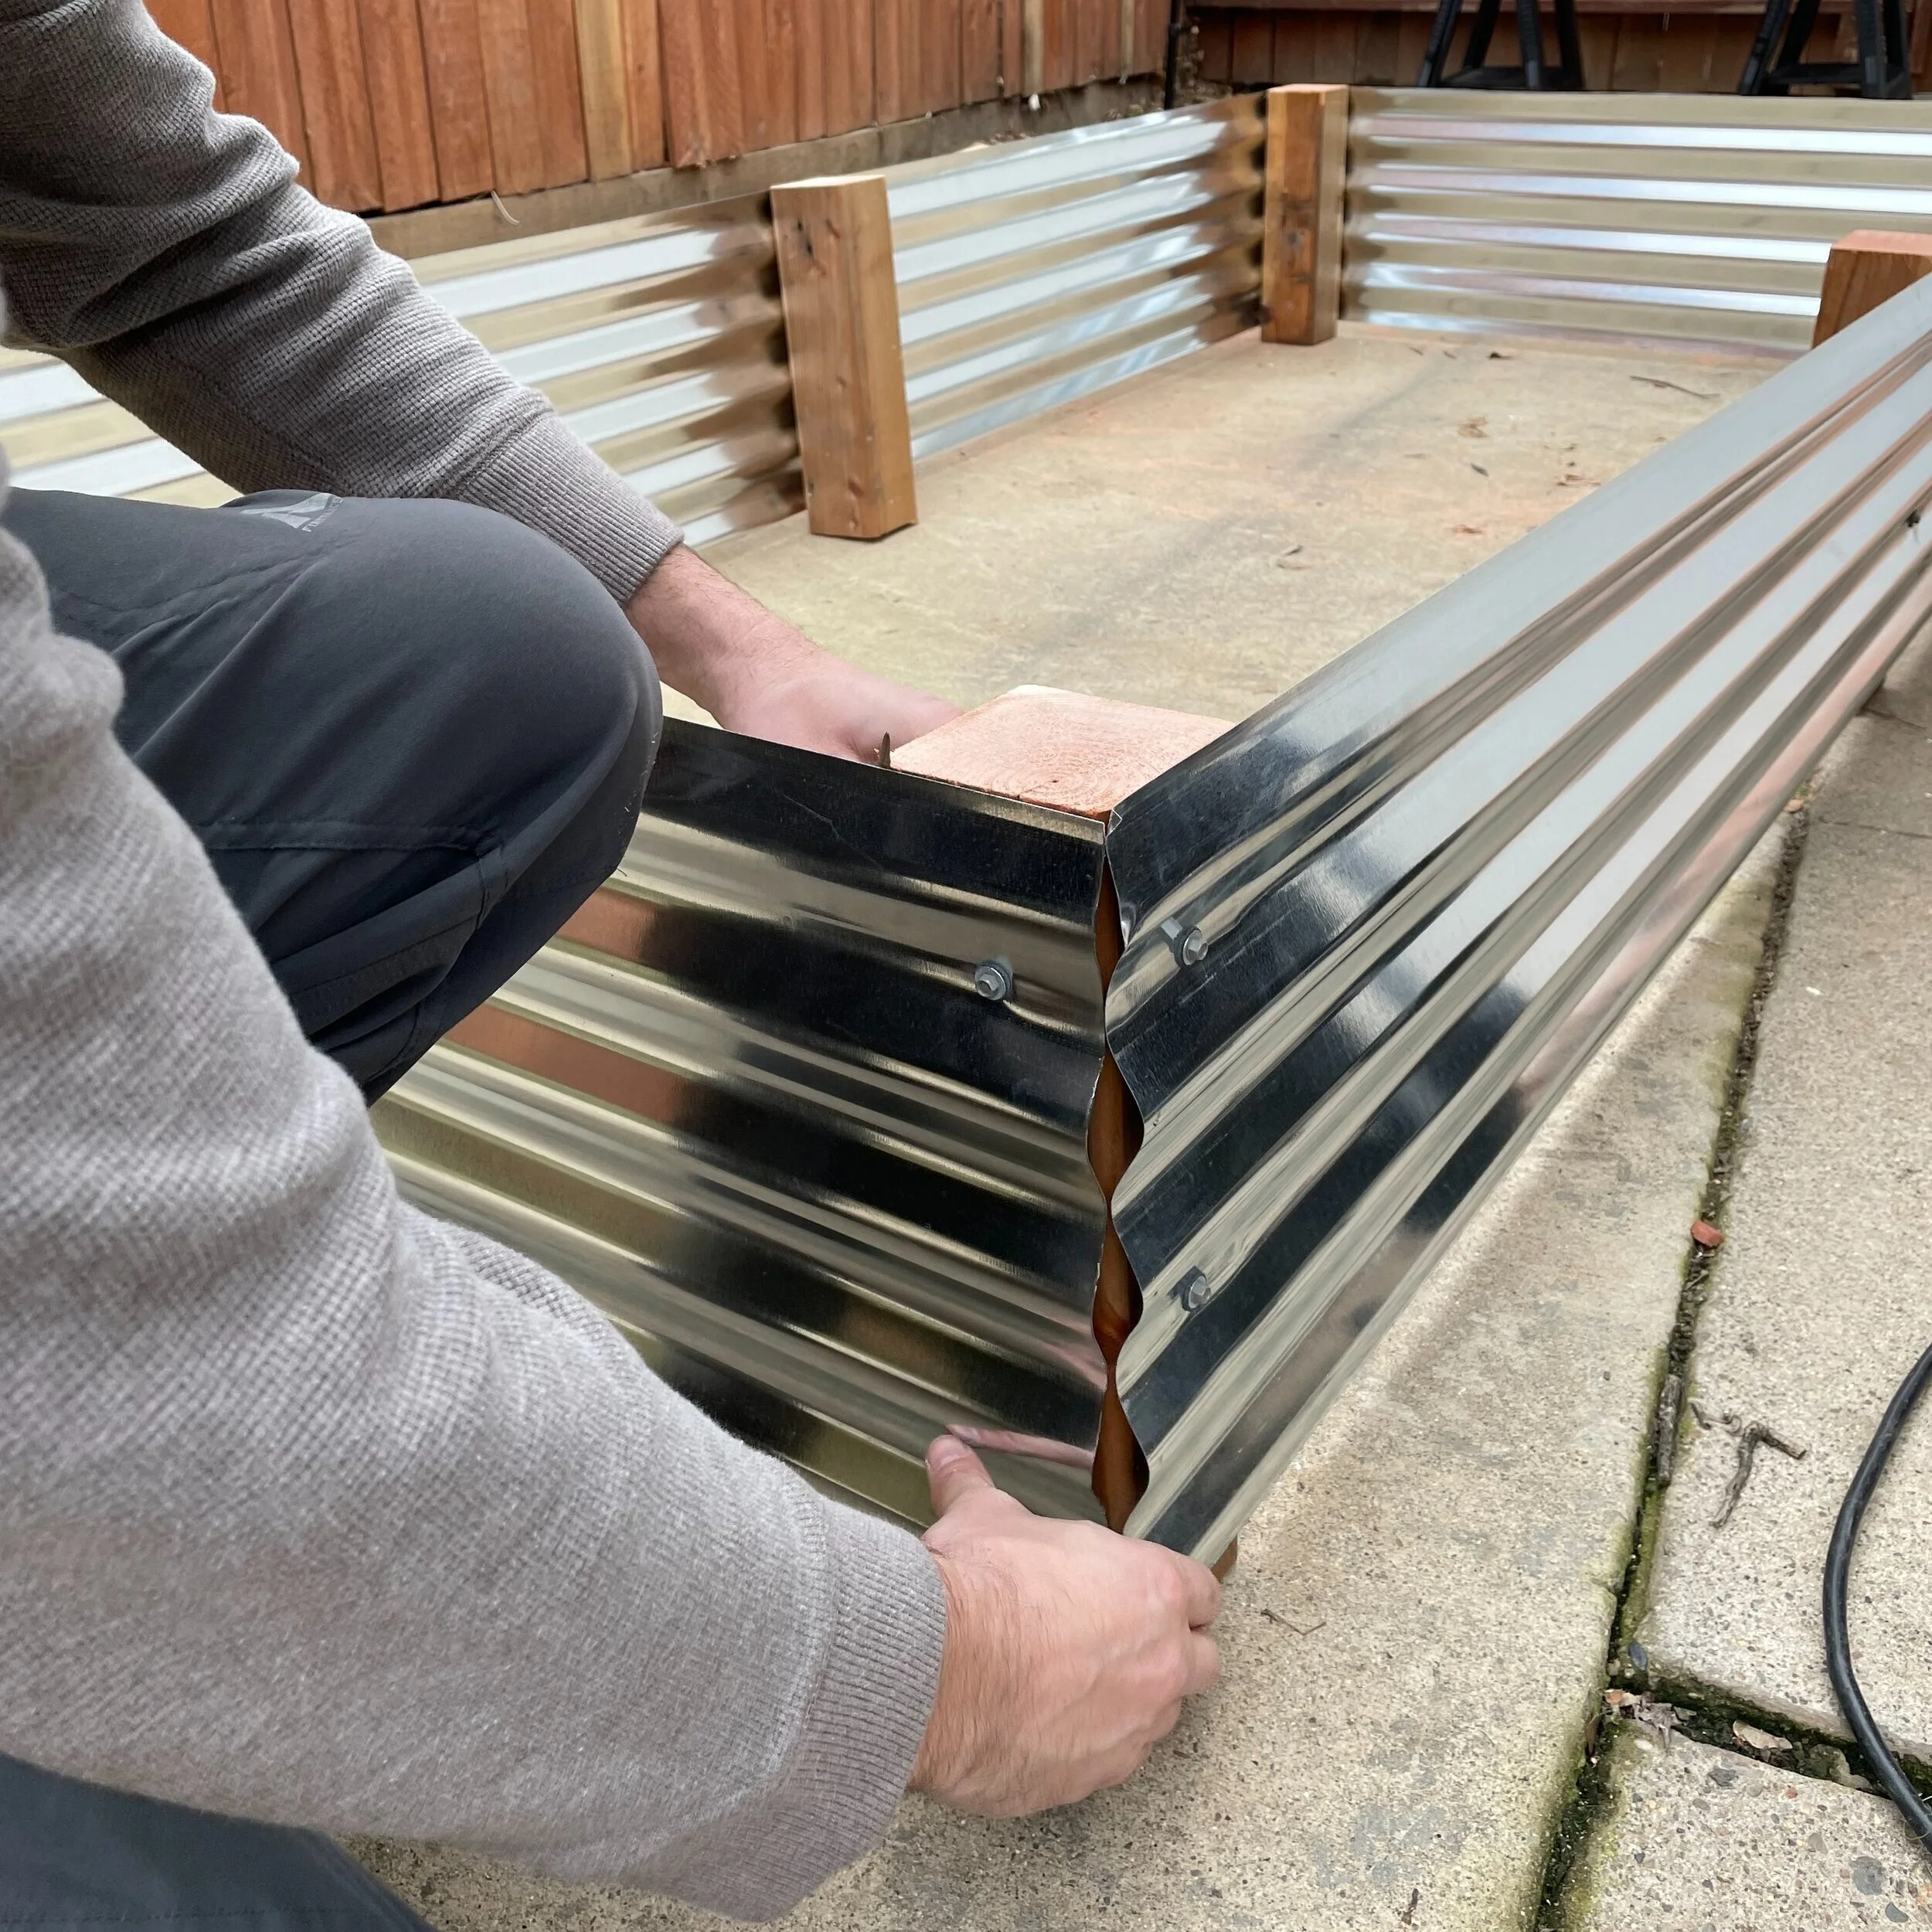
DIY Raised Garden Bed Step 3: Attach metal sides to the 14” posts
THREE: Assemble the long sides using the 1” steel roofing screws. Place 3 of the 14” post on the ground and position a 92” panel on them. Place two screws in to each post allowing for 1” to protrude from the bottom. Repeat this process with the second 92” panel.
Place the two long sides upright and position the short ends against the posts. Screw in the 44” panels in to the posts ensuring each side is flush and square.
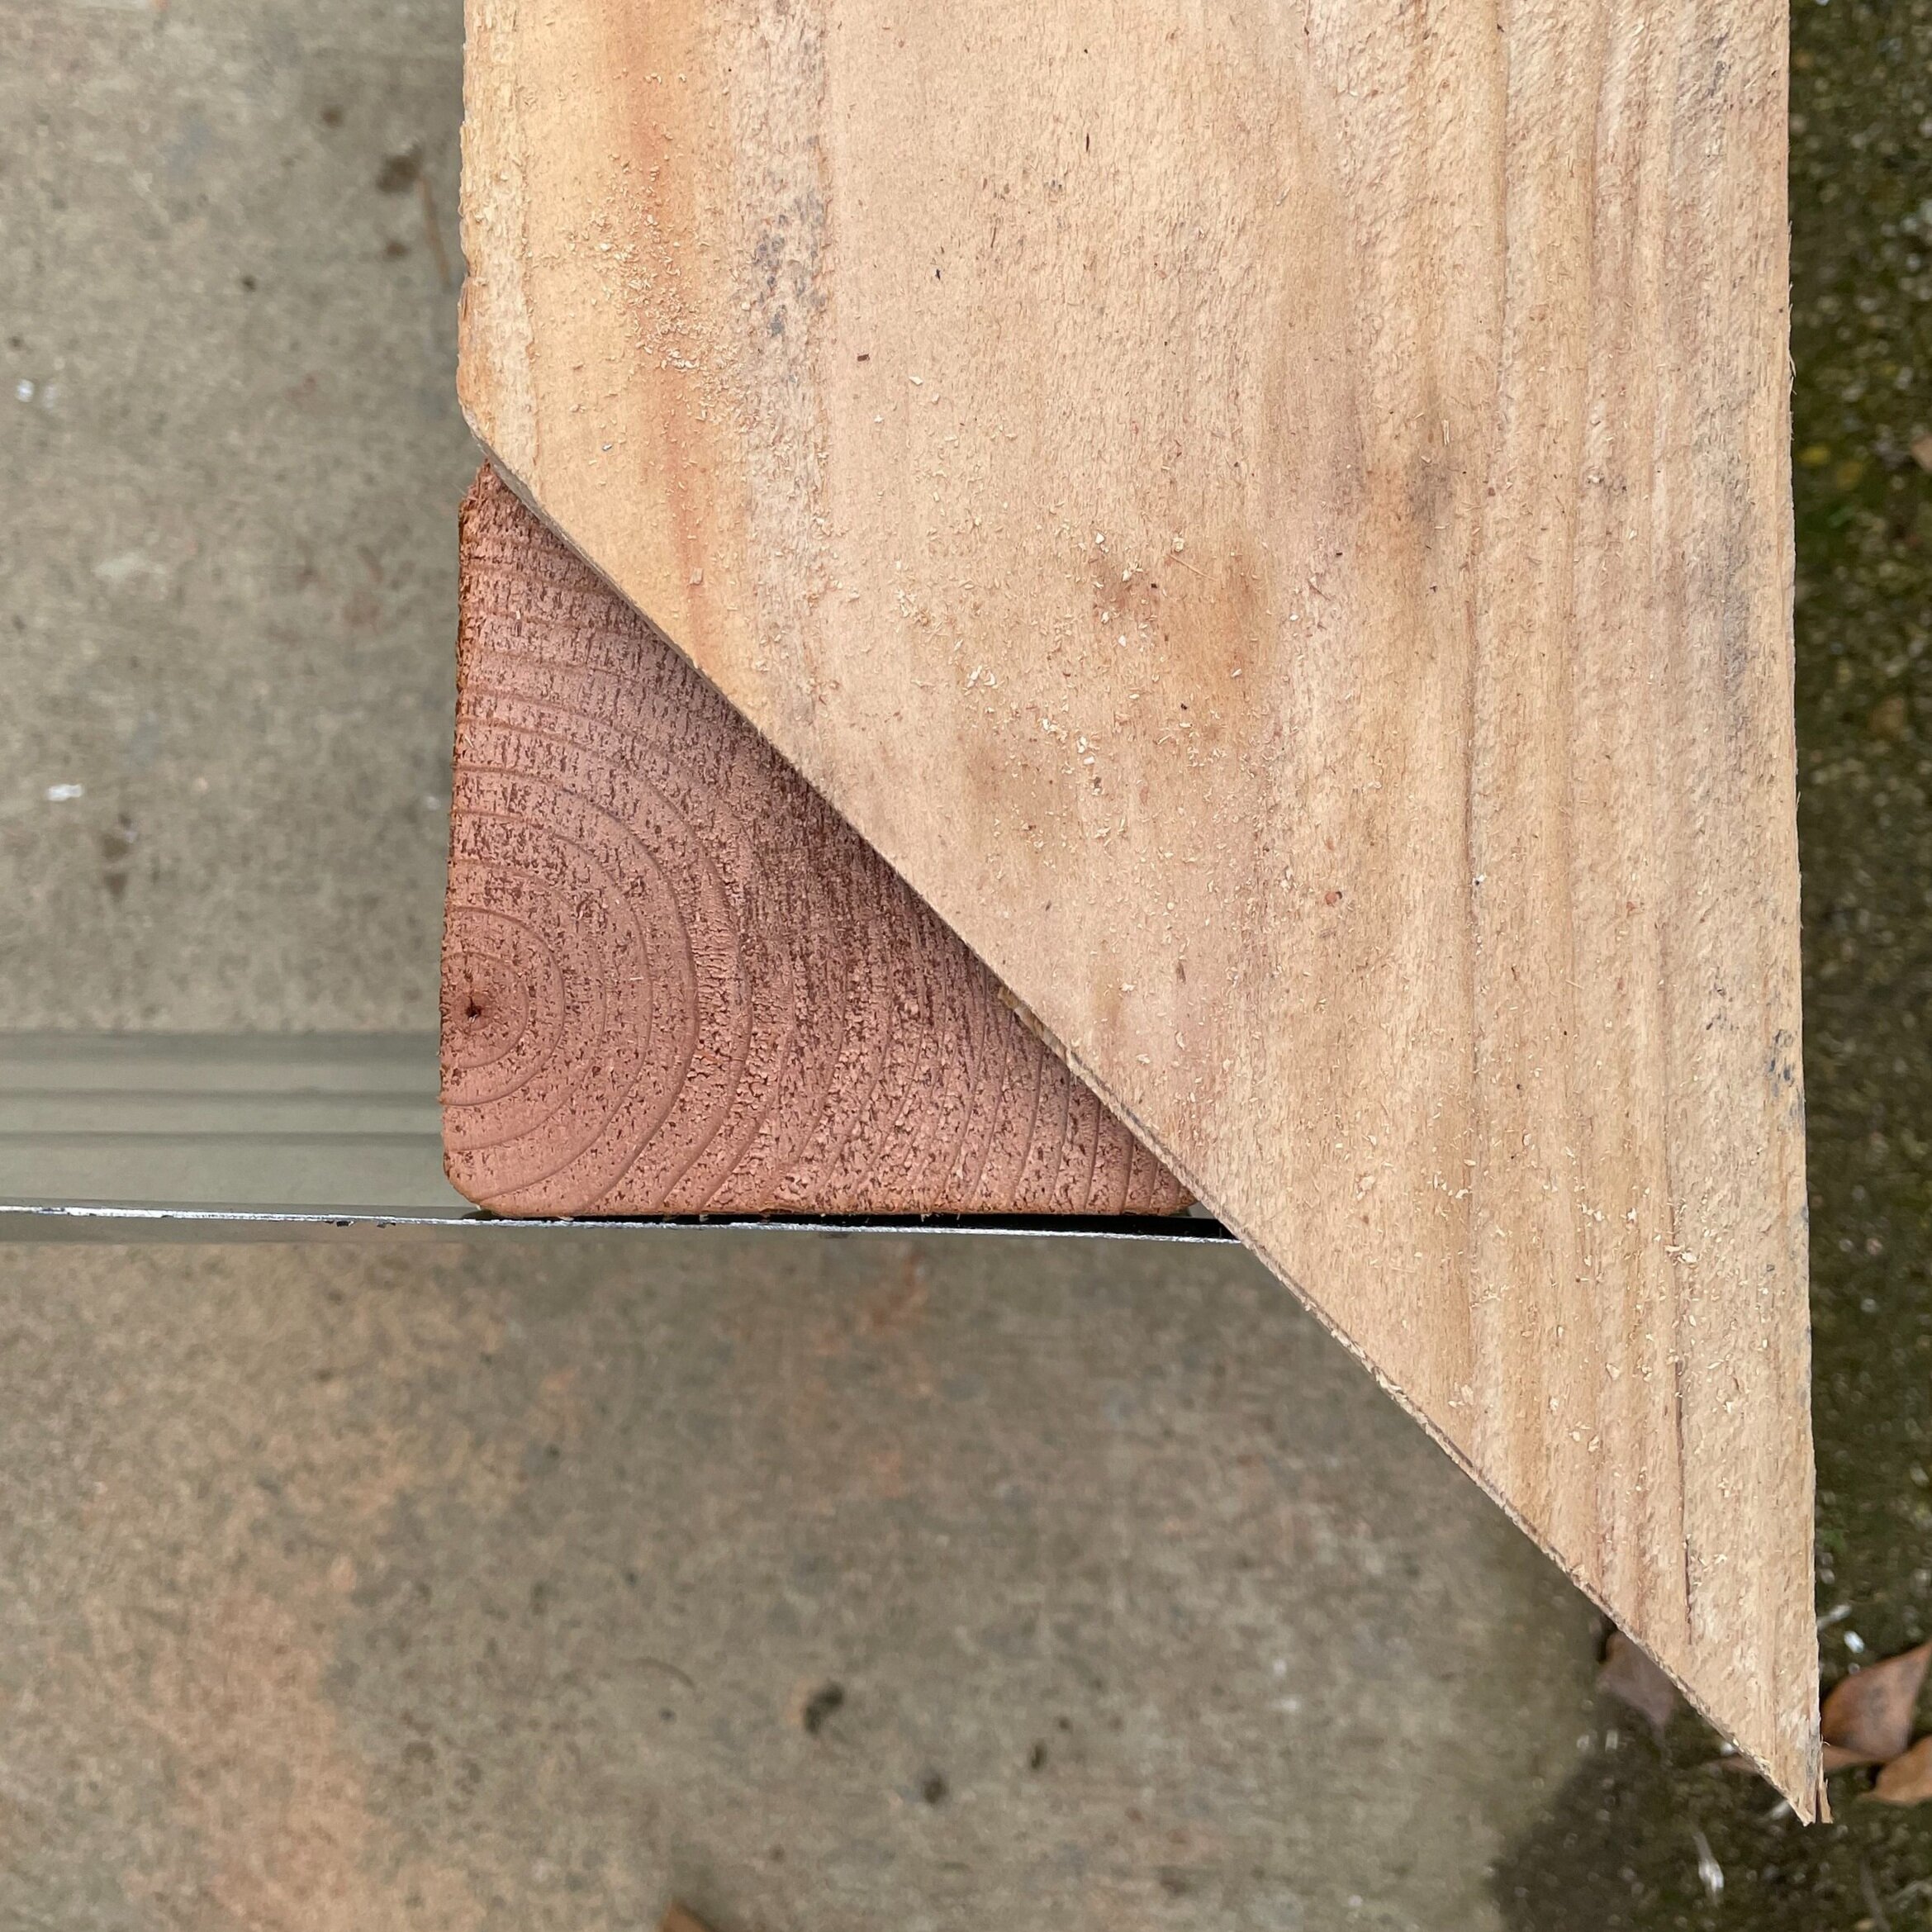
DIY Raised Garden Bed Step 4: Cut and attach the wood caps // NOTE here the placement of the cap to achieve an overhang on the outside of the garden box
FOUR: Cut (2) of the 1”x6”x8’ boards at 45 degrees. Ensuring that the inside corner is flush with the inside corner of the 4”x4”, screw the long ends in with 1 1/2” exterior wood screws.
Cut the remaining 1”x6”x8’ in half.
Cut each end of the 48” pieces on a 45 degree angle.
Place them over the short end, ensure your seams are flush and secure with remaining wood screws.
*Note: If the seems are not matching snug you may have to remove one side of the roof panel and adjust until a flush seam is achieved.
Some notes about customization:
You know us, we always encourage customization with all of our DIY projects. These raised beds are extremely easy to customize, but we have a few things you will want to keep in mind:
The metal roofing typically come in 26” x 12’ sheets, so to minimize waste (or extra cuts!). You can easily make these garden boxes taller, but keep in mind the taller you go you may need to add extra 4”x4” supports to prevent the metal from bowing.
This roofing panel could also be used to build (2) 3x3 raised beds, however you would need 10’ of 4”x4” with one support in each corner.
Want to build multiple smaller boxes? Buy (4) sheets of the galvanized metal and turn them in to (3) 4’x4’ beds.
If you’d like to watch a video on the raised bed build check out our YouTube video! Subscribe to never miss out on the OLH happenings and be sure to follow us on social media to say hello! We hope you enjoyed this how-to and if you have any further questions be sure to leave us a comment! Tag @OurLibertyHouse with your finished product.
Happy gardening!
-Lucas & Beth
If you enjoyed this article you may also enjoy these!
4 Reasons to Install Drip Irrigation